Note:
- These instructions are the same for the Bowden and direct drive plates. The instructions show the stock setup (1_LeftV3.6_Bowden.stl + 1_RightV3.6.stl). Even though the plates of the direct drive setup look a bit different, the installation steps are the same, with a DDE setup you can simply skip the reinstallation of the extruder.
- Depending on your setup you might have to remove the PSU to have acsess to the plates. I also uploaded a new PSU hoder to mount the PSU to the bottom 4040 profile. To save some filament you could also drill a few holes on the stock mount.
1. Plate Assembly
a) Nut Installation (Both Sides)
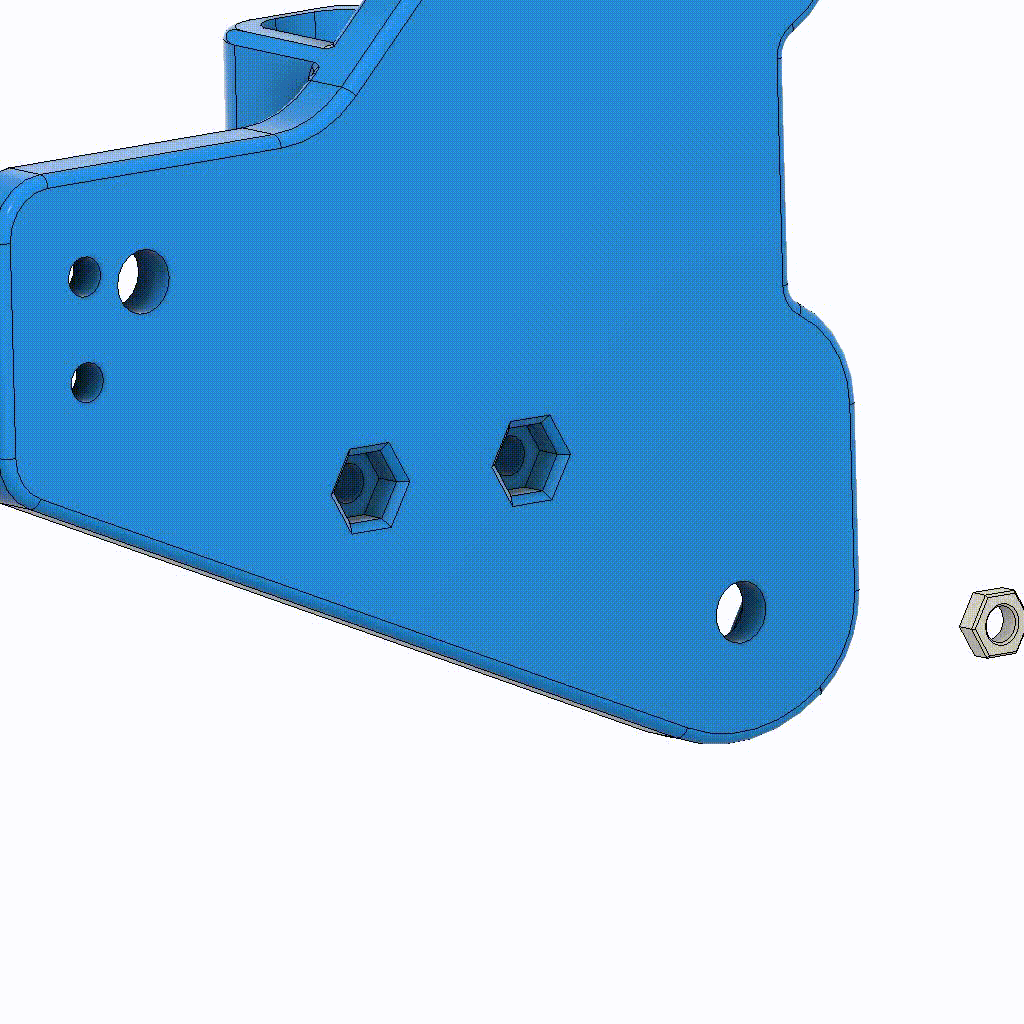
Insert two M3-Nuts in the back of the plates as well in the slot on the front.
b) Secure the nuts (Both sides)
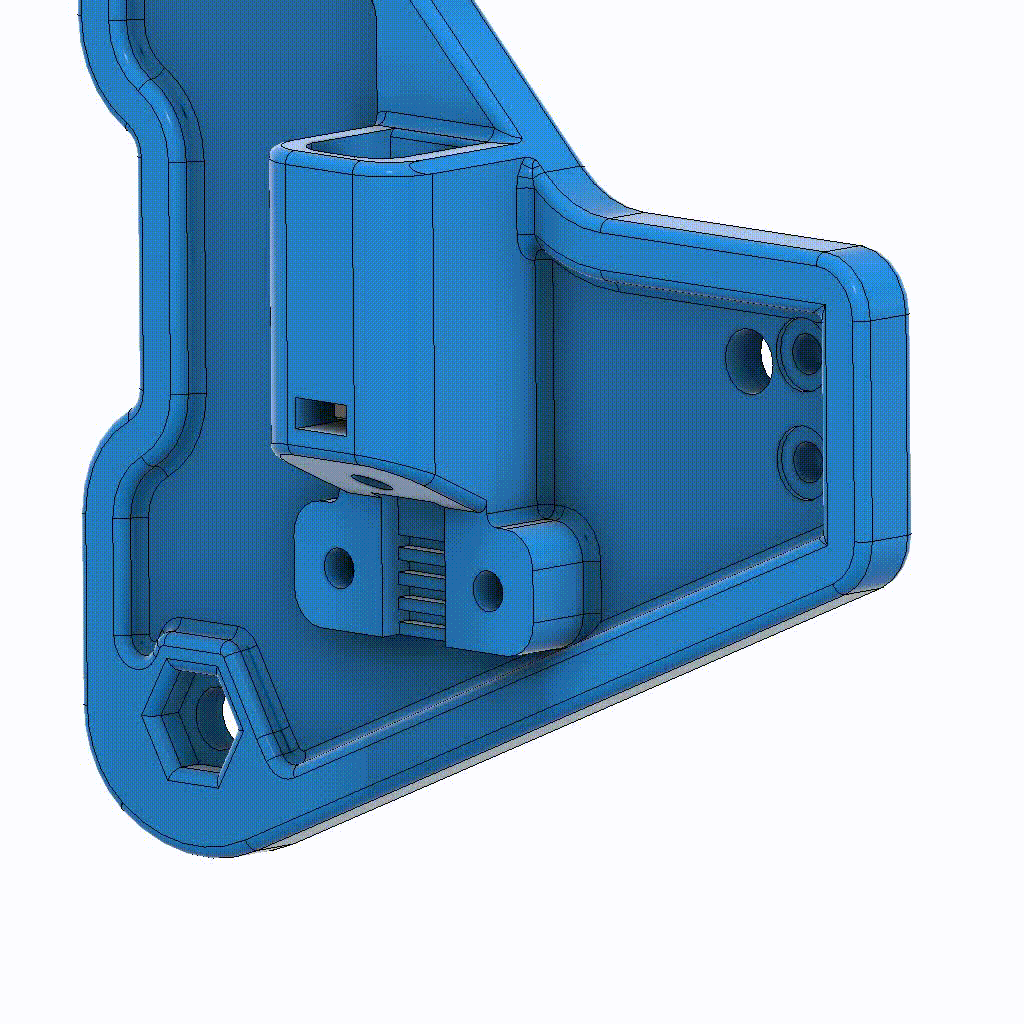
To keep the nuts in place you can temporarily fix the Belt-Clamps (2_TensionerClampV3.stl) with two M3x12mm and the Belt Block (2_TensionerBlockV3.stl) with a M3x25mm screw.
2. Plate Installation
a) Remove Leadscrew Plate
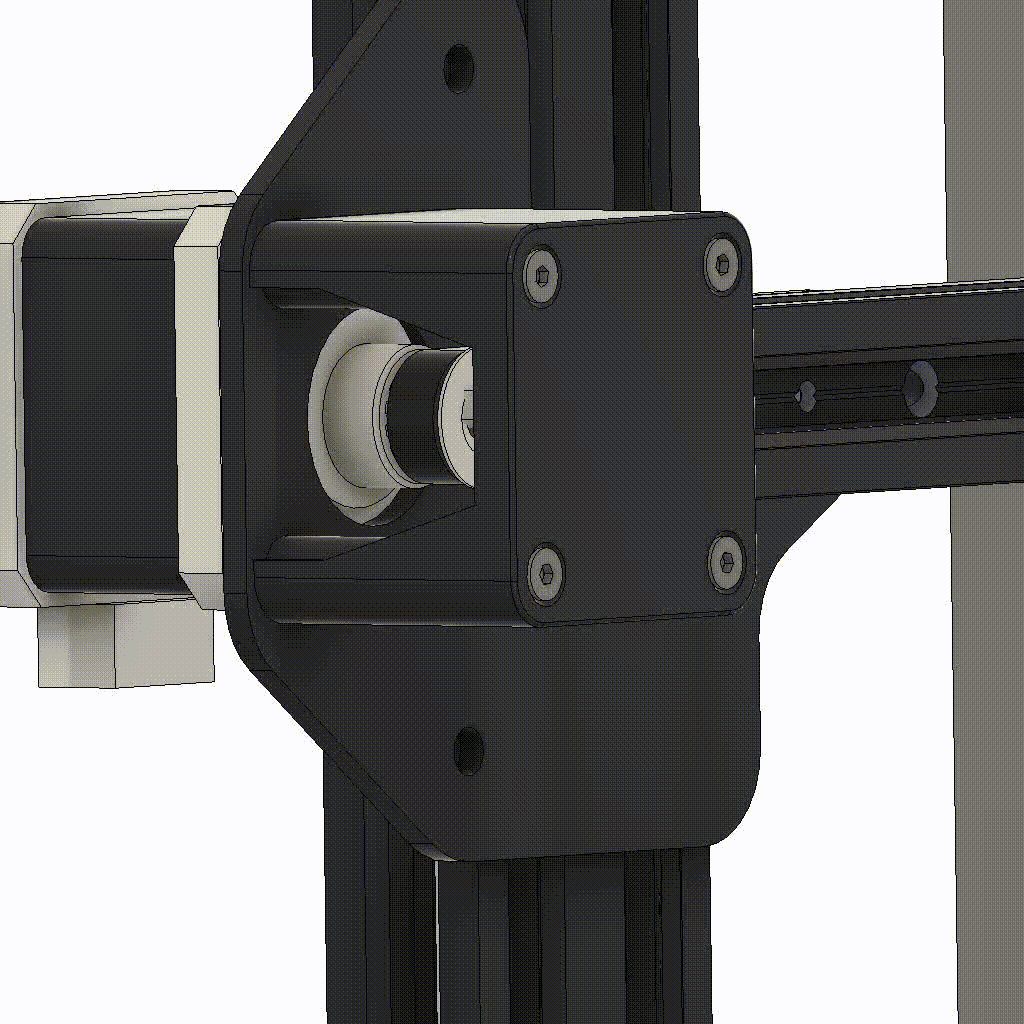
First you have to remove the old plate with the leadscrew nut. To get to the M5-Nuts more easily you can first dismantle the extruder. You will need it again on the new plate later if you want to build a Bowden setup.
c) Mount Left Plate
Install the new printed plate (1_LeftV3.6_Bowden.stl or 1_LeftV3.6.stl) and secure it with the M5 nuts you removed two steps earlier. Reinstall the extruder if necessary.
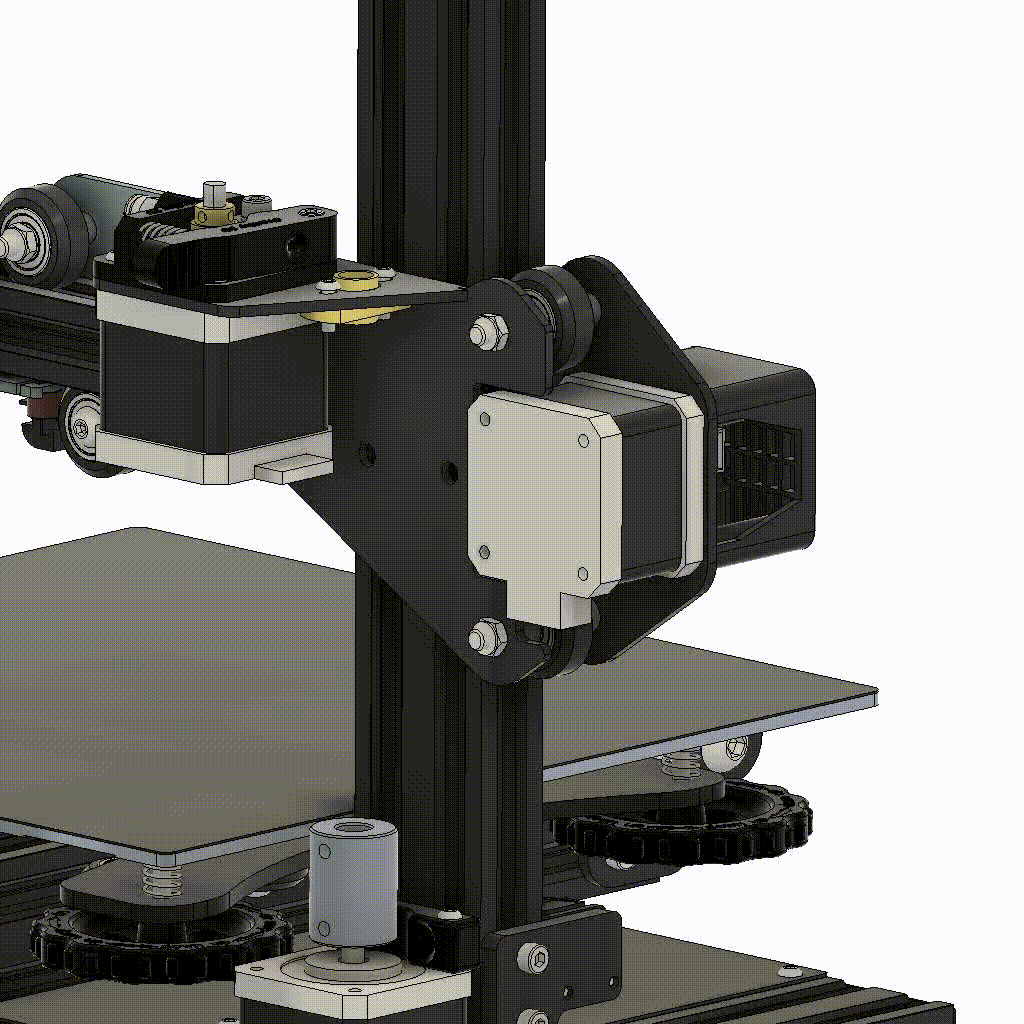
b) Rotate X-Motor
Loosen/Remove the 4 screws that are underneath the sticker on the X-Endstop housing, rotate the motor by 90° so the connector is facing to the left and tighten the 4 screws again.
ㅤ
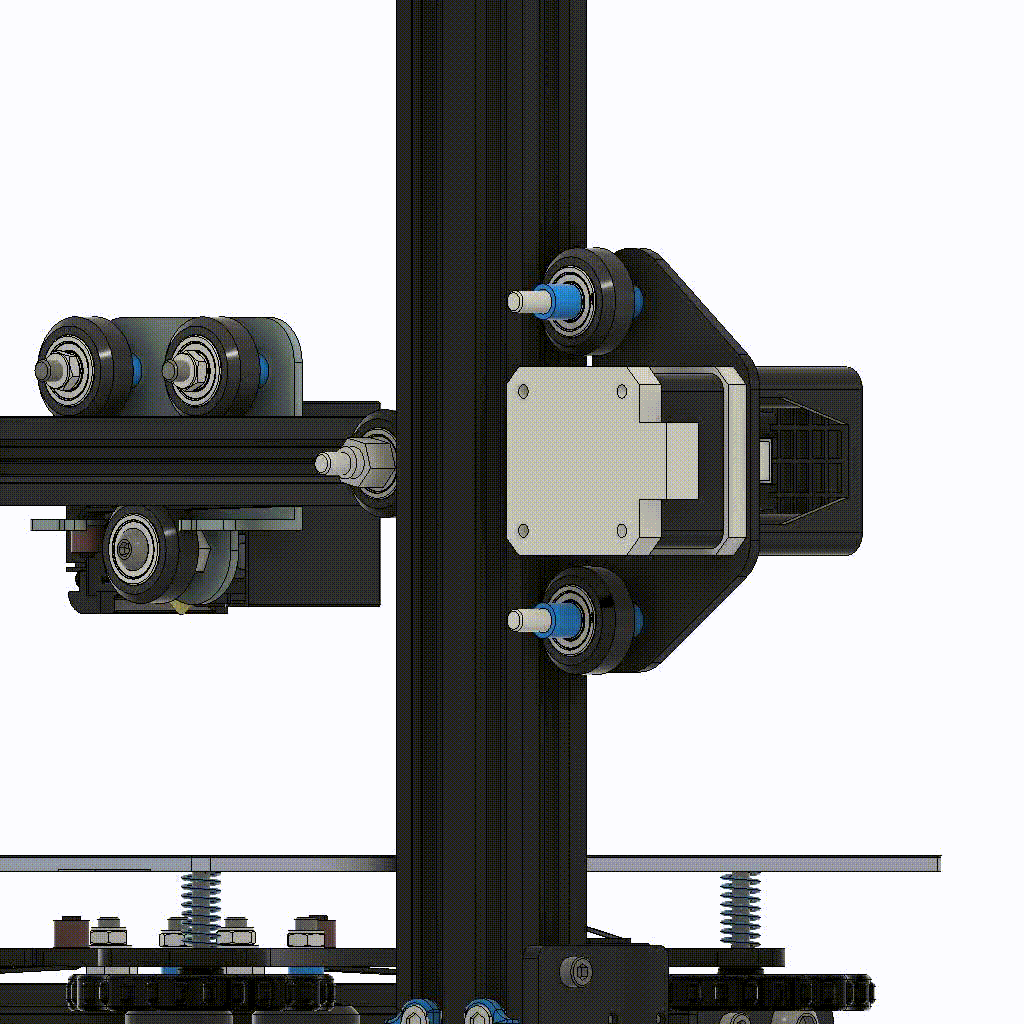
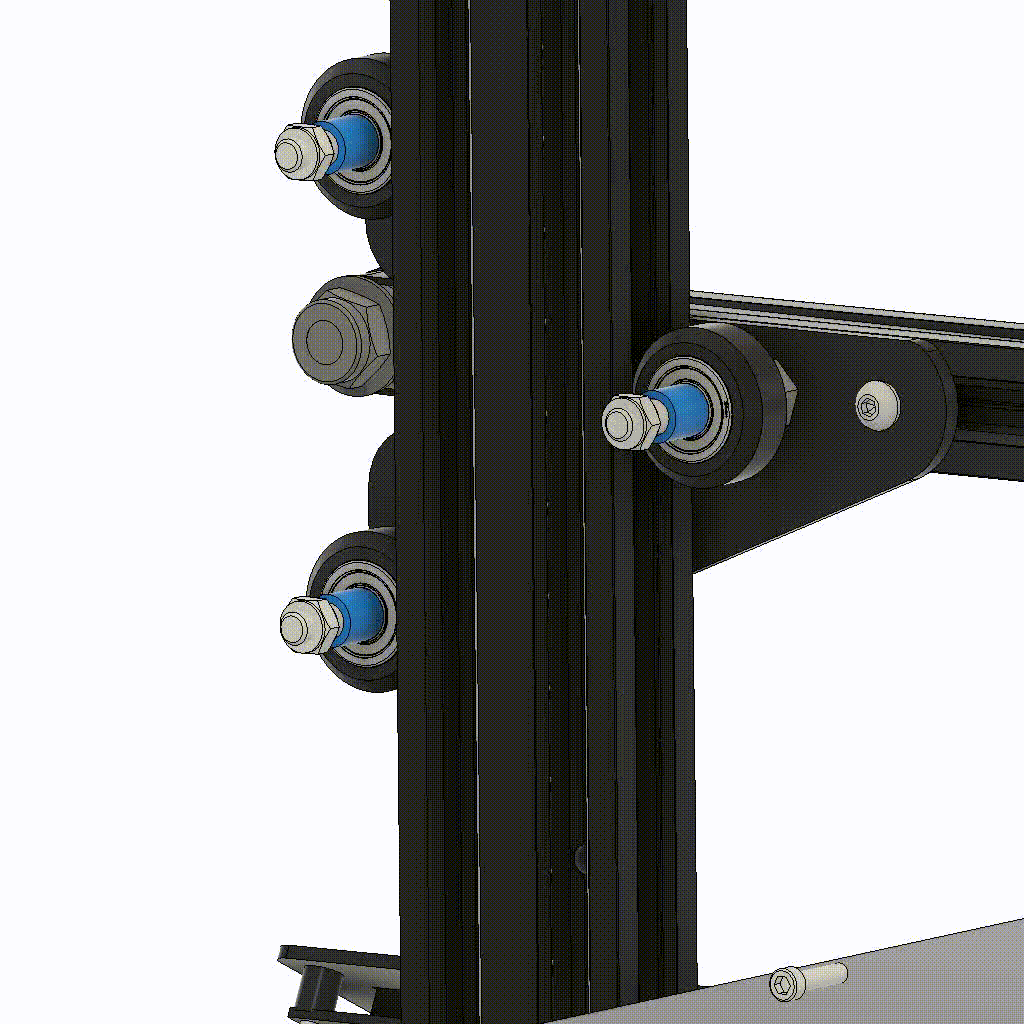
d) Mount Right Plate
On the right side you have to replace the inner M5x30mm screw with a M5x40mm one. First remove all three roller assemblies. Note the orientation of the excentric nut on the inside, the thick end needs to be placed back into the metal plate later. To replace the inner screw, remove the right small M4 screw and loosen the left one. Then you can turn the plate and replace the M5 screw. Mount the plate again and make sure that the upper edge of the plate is parallel with the x-axis profile. Also insert the two new M5x40mm screws on the outside into the plates. When installing the rollers, make sure that the thick side of the eccentric nut is in the metal plate! Finally, mount the new printed plate and secure it with the M5 nuts you removed at the beginning. Reinstall the Extruder on the new plate if you want to build a Bowden setup.