Below, you will find a list of all the parts you need to build the Papilio. The links for the print files will direct you to my GitHub, where you can download all the STLs in a zip file (the download will start automatically). Below the listing of the required parts and files, you can start with the build instructions. I have done my best to ensure that everything is easy to understand. If you still have any questions, please feel free to join my Discord.
Even if you don’t have any questions, I would appreciate some feedback about your building experience and how the Papilio worked for you 🙂
Bill of Materials
| Category | Component | Quantity | Notes | Example Source |
|---|---|---|---|---|
| Electronics | Nema 14 (round) | 1 | Do yourself a favor and get a Moons motor. Read the FAQ at the bottom of the Papilio Page for more informations. | Aliexpress |
| Extruder Hardware | BMG 50T reduction Gears on the 5mm metal shaft | 2 | Aliexpress | |
| 6mm-102mm GT2 closed looped belt | 2 | 6mm wide, 102mm long closed looped GT2 Belt | Aliexpress | |
| 6mm-20T Idler, 3mm bore | 2 | |||
| 6mm-16T Pulley, 5mm bore | 2 | |||
| Bearings | MR85 zz or MR85 2RS (sealing type doesn't matter) | 2 | 8*5*2.5mm (These are the regular BMG shaft bearings) | |
| 6703 zz or 6703 2RS (sealing type doesn't matter) | 2 | 17*23*4mm | ||
| Hardware | M3 (3x5x4mm) heat inserts | 4 | ||
| M3x18mm SHCS or BHCS | 4 | |||
| M3x6mm BHCS | 1 | can be longer to mount strain relief spacers | ||
| M3x6mm FHCS | 1 | can be longer to mount strain relief spacers | ||
| Optional | E3D Embedded Bowden Coupling for Metal | 1 | Small brass ring with the black bowden collector. This can be used insead of a press fit fitting |
STL Files
Print settings:
- All parts can be printed without supports
- Normal print settings (0.4mm nozzle, 0.2 layerheight,4-5walls/tops/bottoms) are totally fine
- If the tolerances are too tight you can edit the tolerances in the parametric CAD File.
- Extra tips for the printed Pulleys:
- Printing slower can result in a better teeth profile
- Use a random / scattered seam to avoid a bulge on the pulleys (see screenshot below)
- To get an even cleaner seam you can activate the Wipe inside at start and end in slicer
- Do not use abrasive filament on the pulleys, especially the AIO pulleys as they will damage the hardware
Check out user mods
| Creator | Mod Title | Description | Papilio | Papilio Lite |
|---|---|---|---|---|
| KevinAkaSam | XOL2 Mounts | XOL2 Mounts for the Papilio (Lite) with Tap | ✓ | ✓ |
| Stealthburner Mount | Stealthburner Mount for the Papilio Lite | ✗ | ✓ | |
| hawk16zz | PapLite Combo Mount< | PapLite mount for Frank2.0 with extra LGX Lite holes | ✗ | ✓ |
| PapLite Strain Relief | Cable Strain Relief Bracket for PapLite | ✗ | ✓ |
CAD Preview
In case you’re not familiar with CAD but you want to take a look at the CAD for a reference, you can use the online preview blow. If this doesn’t work click here to open it in an extra tab.
Assembly Instructions
Build notes
I recommend to do a quick run test before you mount the extruder to the printer so can reprint things in case something isn’t right. This test run should also include a dry extrusion, so feed some filament with the extruder – you can also take this chance to calibrate the esteps/rotation_distance since it’s recommend to do this without the hotend being mounted (Ellis tuning guide). Most people (including myself) like to grease/lube gears. Of course you can do that for the Papilio as well but be very careful to not grease the belts! Less is more in this case.
The Papilio needs some time to get it’s full printing performance. This is mainly due the curved profile of the Pulleys bending the belts – it takes some time till the belts accepted their new shape. In addition most belts have a coating protecting the rubber which will come off within the first meters of extrusion. You can expect some slight belt dust in the Papilio after everything run in. This is totally normal and nothing you have to worry about. This initial wear will stop very quickly, the belts are tough and last very long. I’m still using my very first belts and they look as good as new
Firmware Configuration
| Marlin | Klipper |
|---|---|
8T NemaE-Steps: ~ 485.00 | 8T Nema[extruder] |
10T NemaE-Steps: ~ 388.00 | 10T Nema[extruder] |
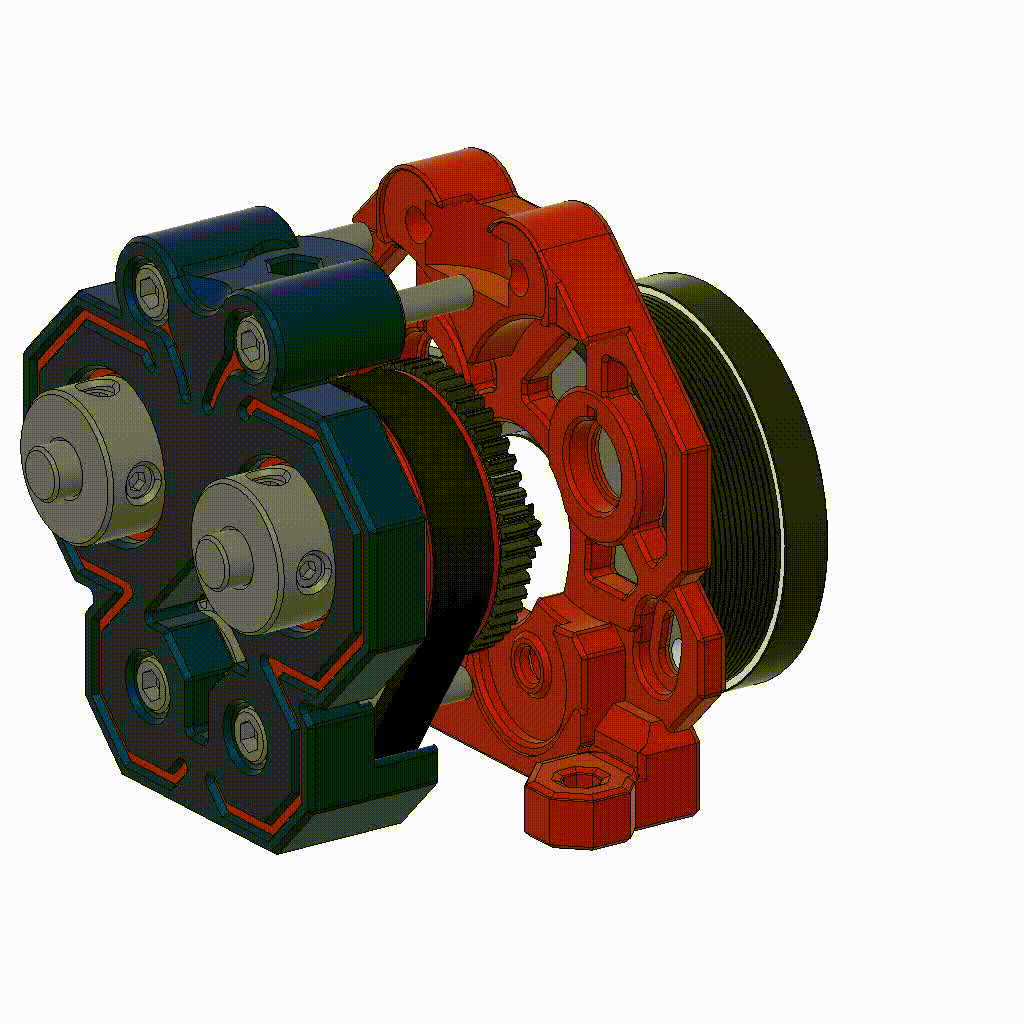
Assembly
Step 1: Bearing and Pulley preparation
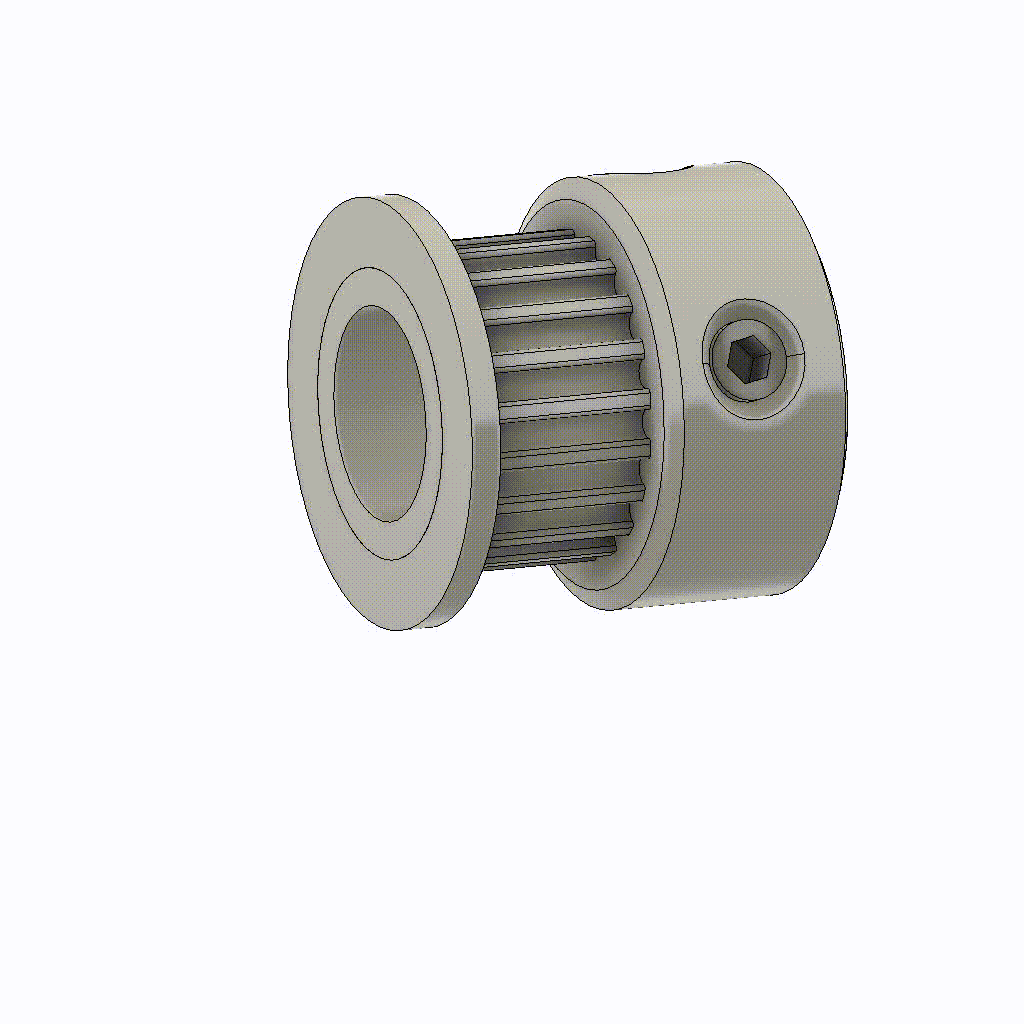
Take the two 16T pulleys; you have to remove the flanges. You can either print a tool or just use a pair of pliers to remove it (Quote billnye: Two on the lip and taco it). I did it this way and had no problems with that.
You can also use a bottle opener (any kind, like the one on a multitool or a proper bottle opener). This has the benefit of never having a chance of damaging the teeth, or the flange.
Do the same for both 20T idlers.
Step 2: Heat Inserts
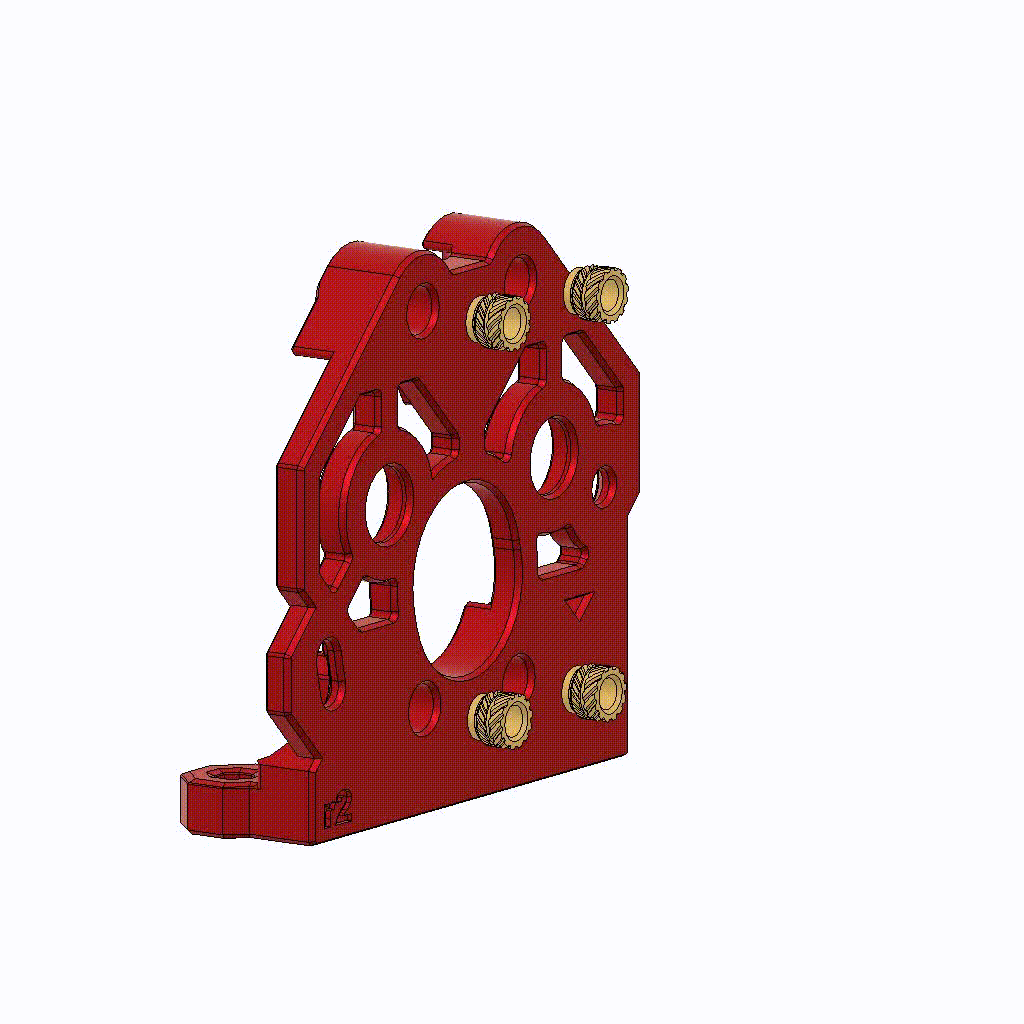
Prepare the Base.stl with 4x M3 (3x5x4mm) screws. Ensure that the lower two inserts do not protrude, as they may otherwise collide with the Nema. Also, be cautious when inserting the insert in the bottom left wall (as shown in the picture), as it is relatively thin.
Step 3: Drive Pulley Assembly (2x)
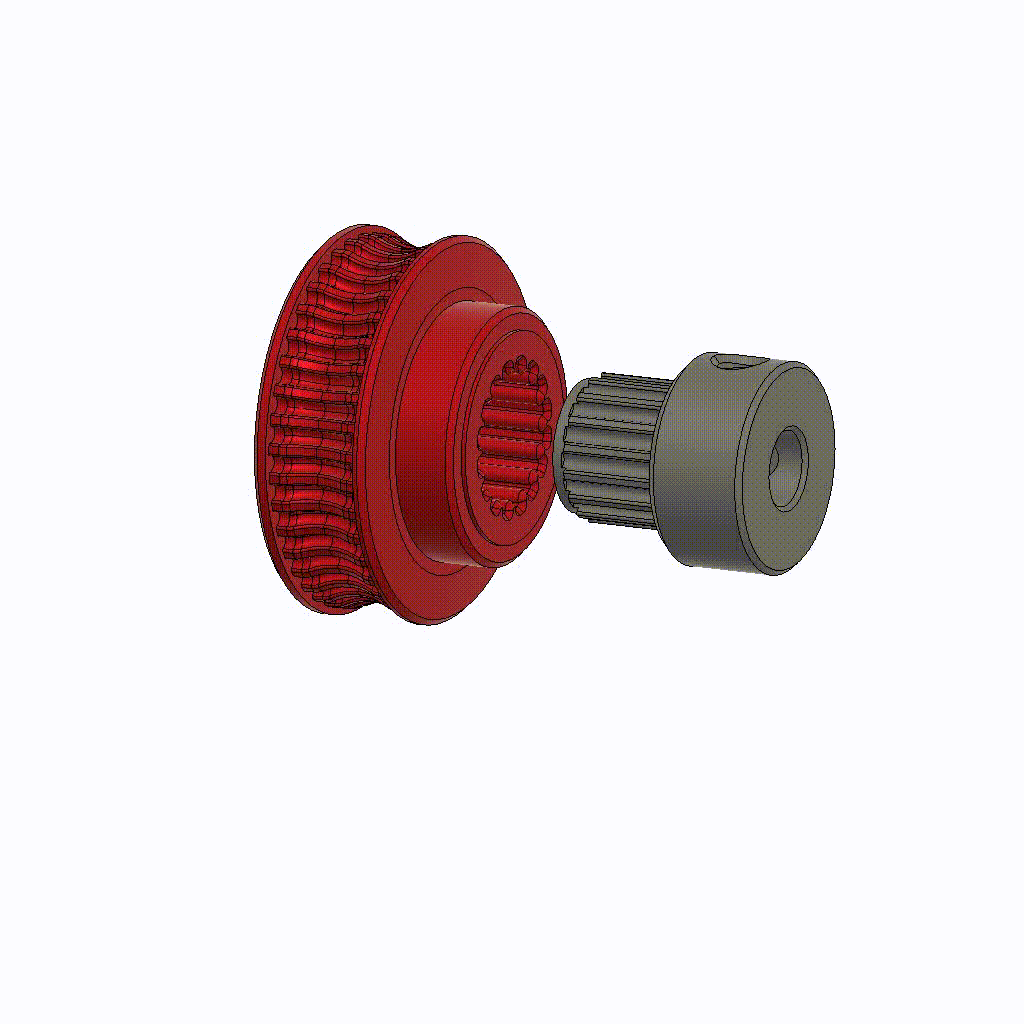
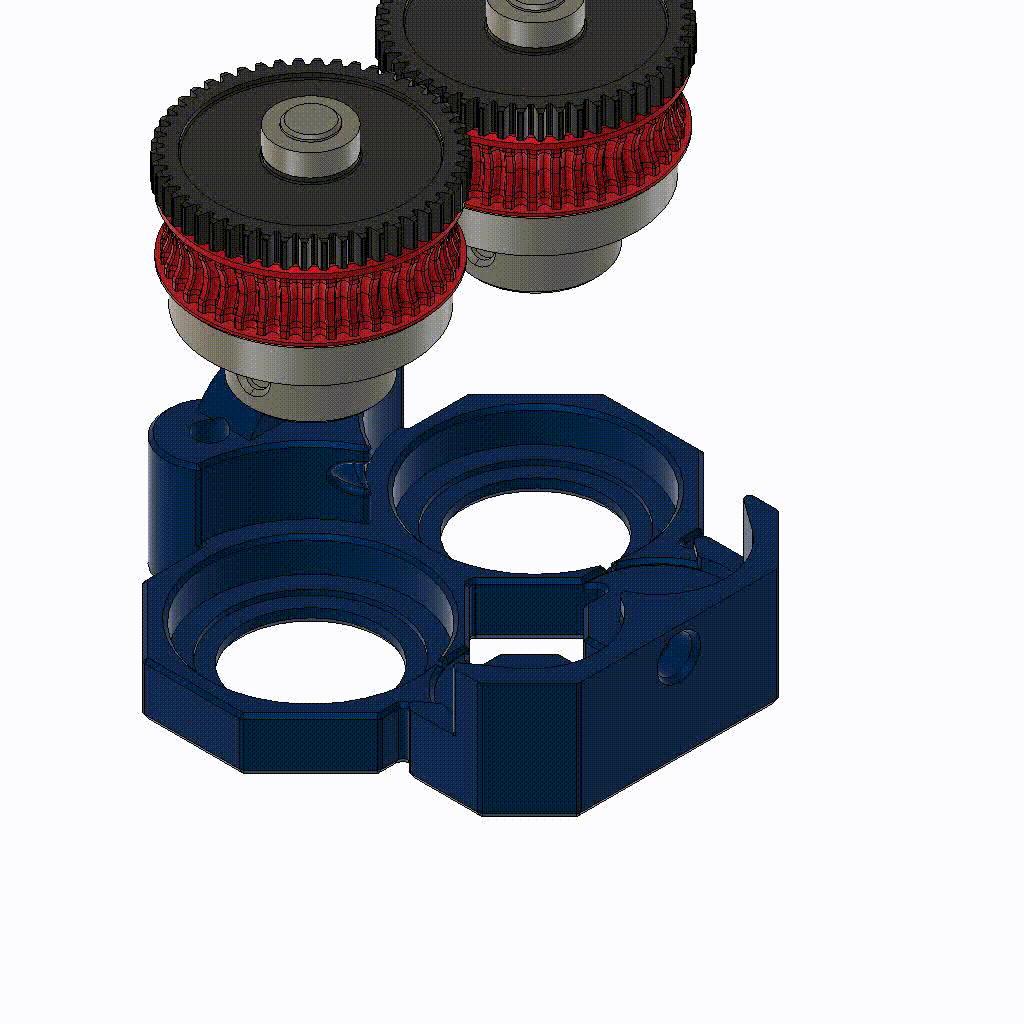
Remember that before you can continue you have to take off the flange of the 16T Pulley. Then take one of the 2_DriveGear.stl and press the 16T inside. It’s supposed to have a very tight fit – you may need a vice or similar to press it in. Clean any curled-up plastic on the inside of the Gear. Repeat this for the second 2_DriveGear.stl.
Step 4: Drive Pulley + 50T assembly (2x)
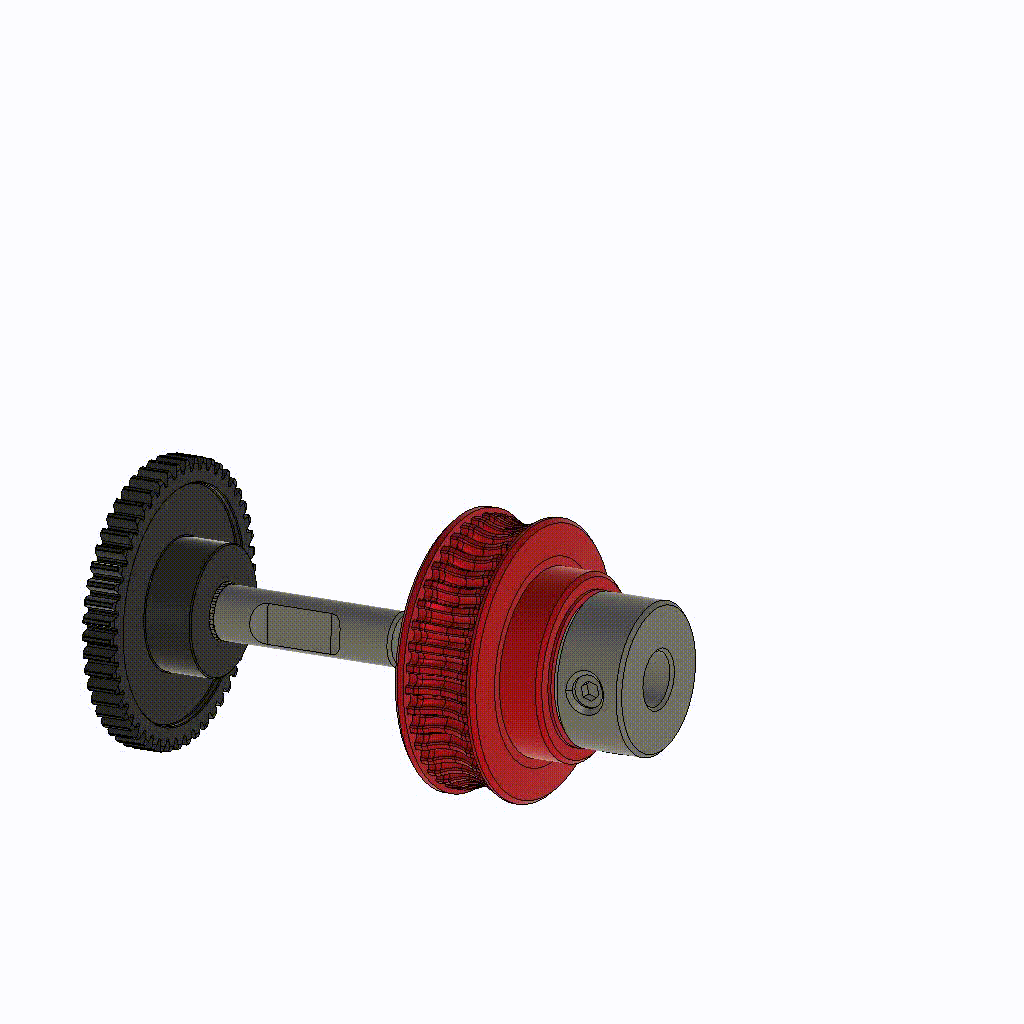
The assembly has to be mounted on the 50T BMG Drive shaft. Make sure the printed 2_DriveGear.stl is parallel (best case flush) with the 50T gear. Not all gears out there are identical so one of my gear sets have a gap of ~0.5 mm between the 2_DriveGear.stl and BMG 50T – that’s totally fine. Also, the grub screws of the 16T pulley may sit on the very edge of the flattened part of the 5mm Shaft, that’s also fine.
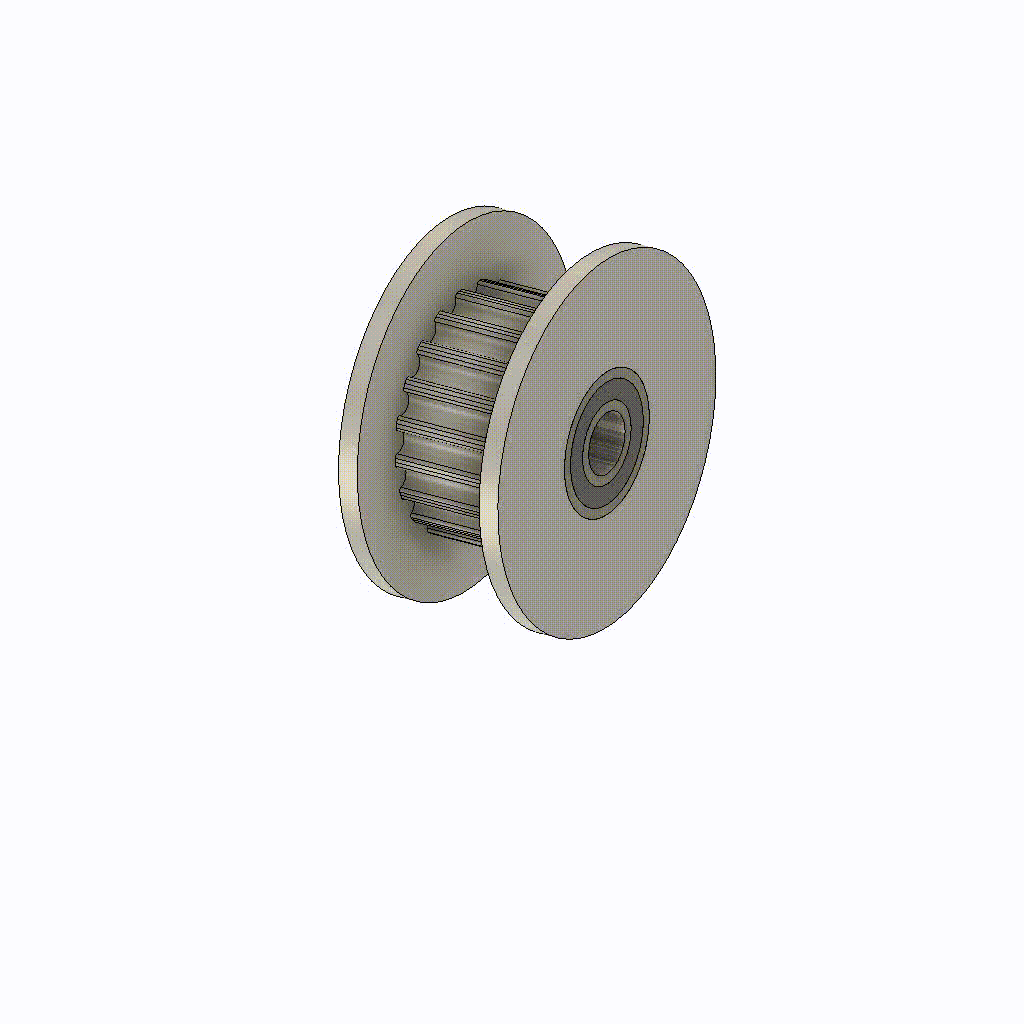
Step 5: Drive Pulley + 6703 Bearing Assembly (2x)
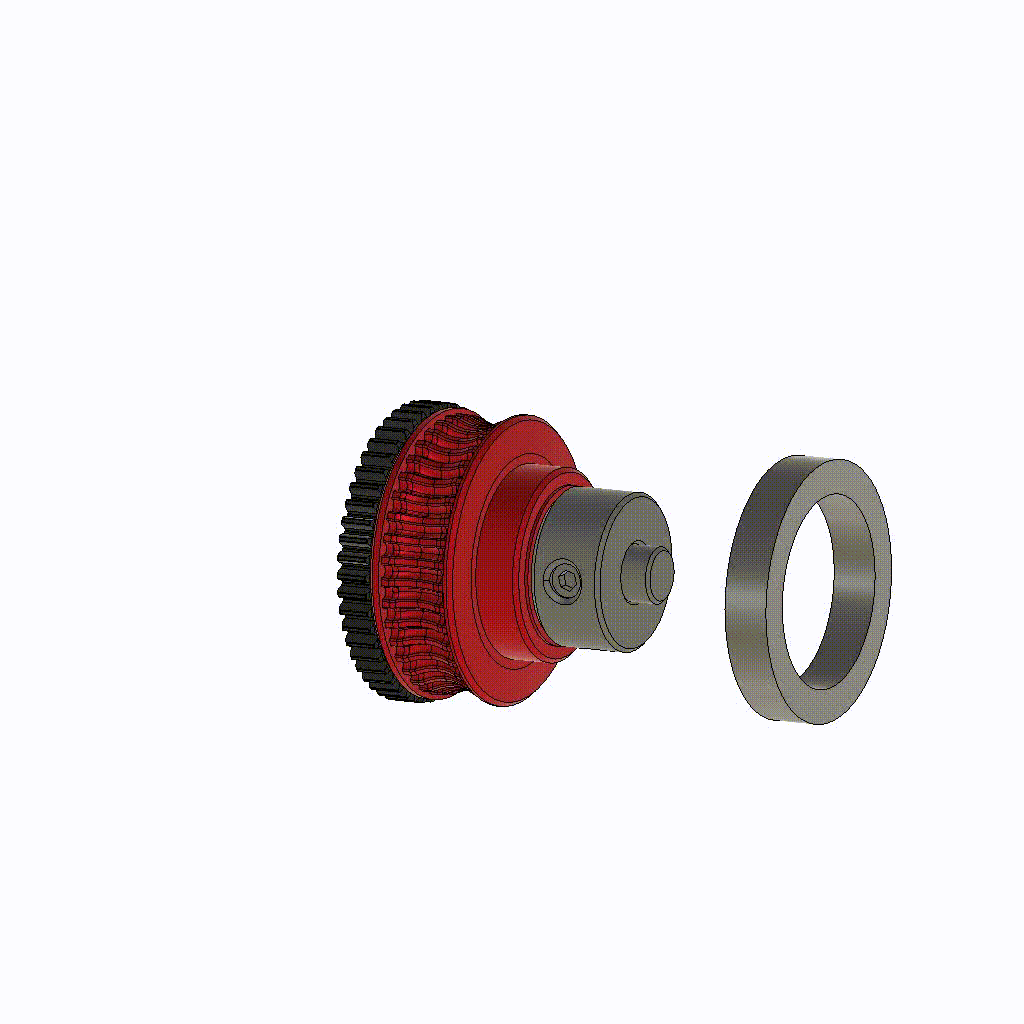
This step is easy enough, just place one of 6703 bearings on each 2_DriveGear.stl.
Step 6: Base Assembly
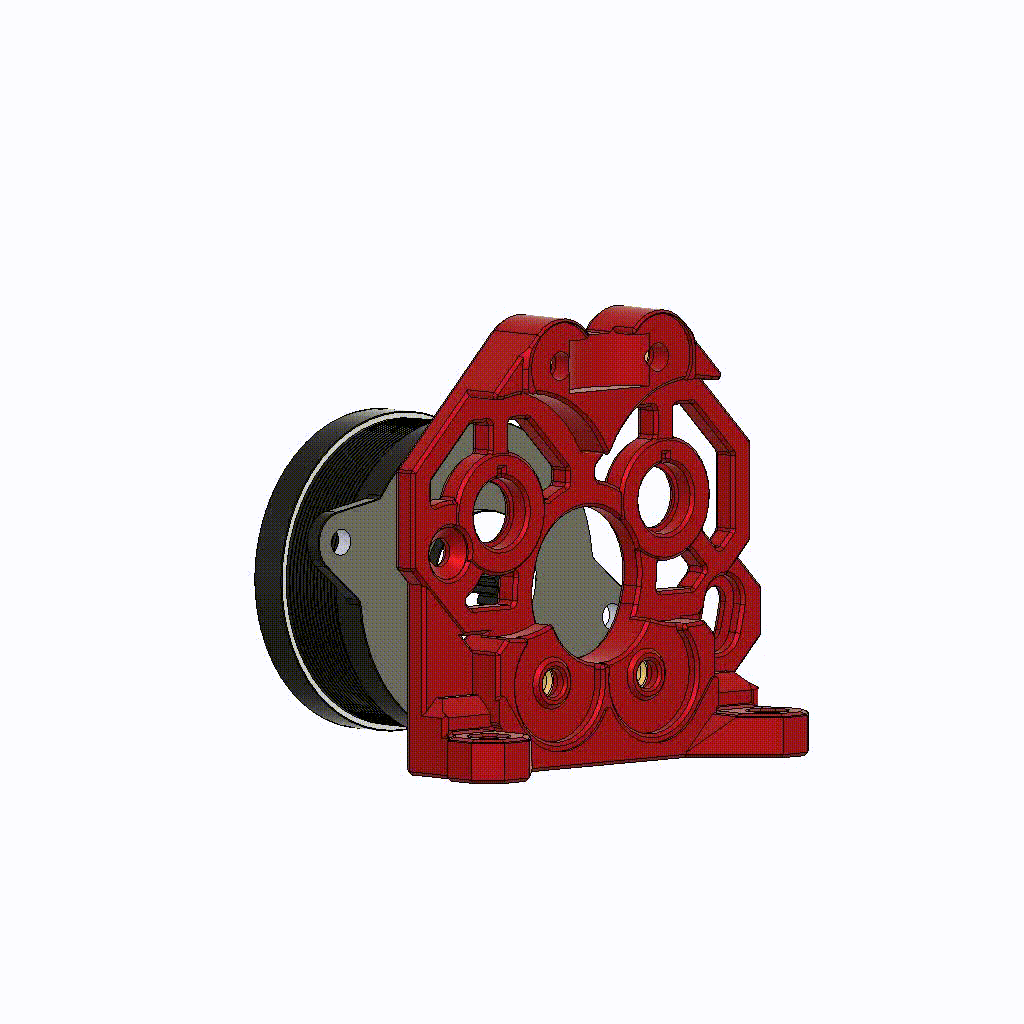
Mount the Base.stl to the Nema 14 Motor (Depending on your mount but the wires should face up). Use the FHCS on the left hole and the BHCS on the right slot. Fully tighten the FHCS already, the Base.stl can still be still adjusted with a loose BHCS (more about that in the last step).
Step 7: Base + MR85
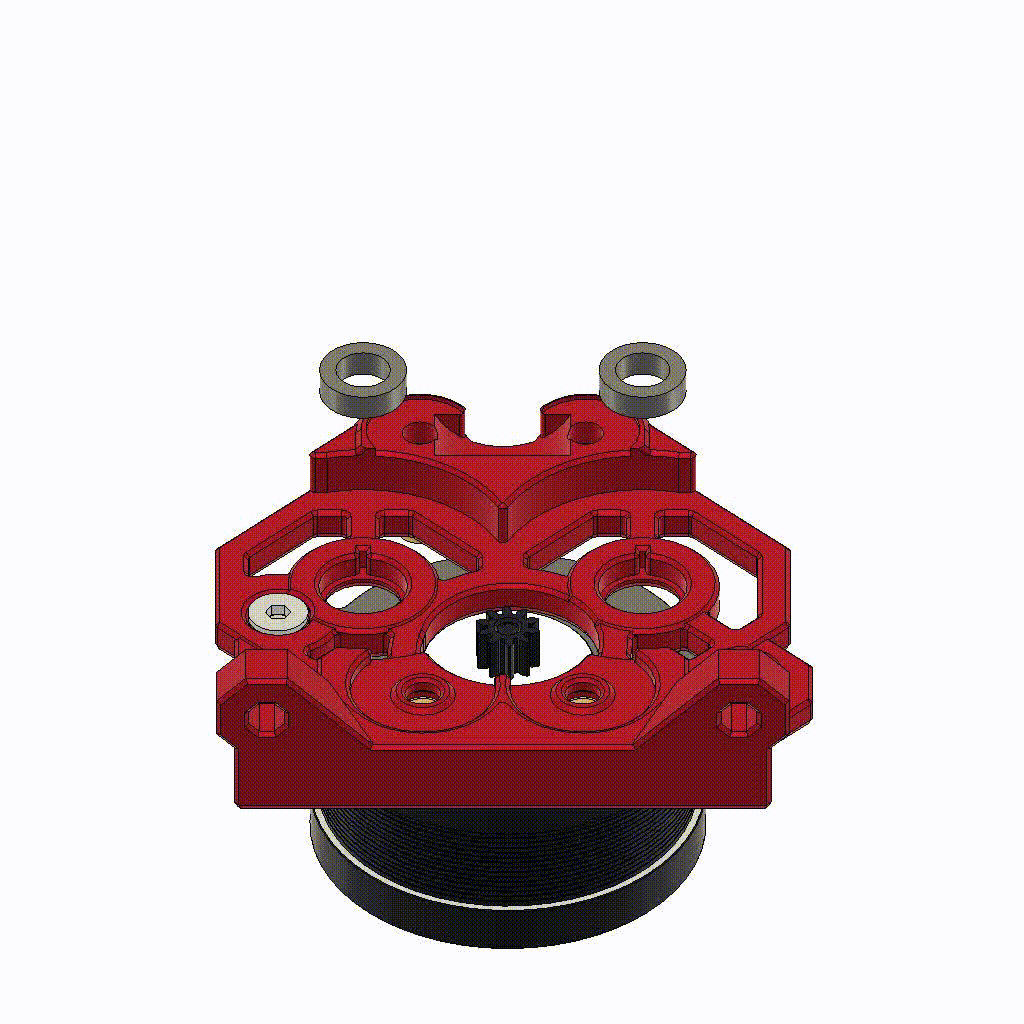
Press the two MR85 bearings in the Base.stl – don’t worry they will stick out there, that’s on purpose.
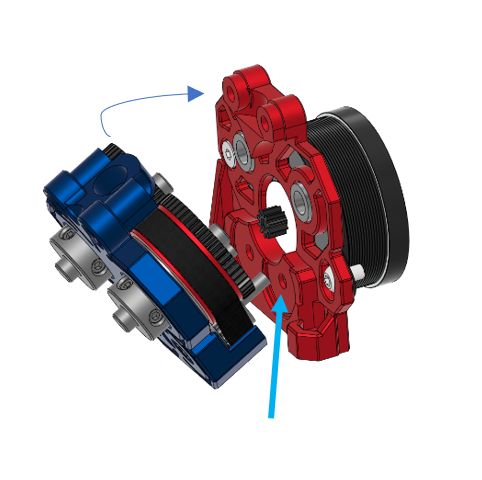
Step 8: Top Assembly I
Mount the assembled 2_DriveGear.stl on the TopShell.stl. You can already warp the belt around the GT2 Profile when placing it on the top shell or you do in the second next step, whatever you prefer.
Step 9: Top Assembly II
Now stick the M3x18mm screws through the 4 holes in the TopShell.stl. These will help with aligning the bottom idlers and the belt.
Step 10: Top assembly III
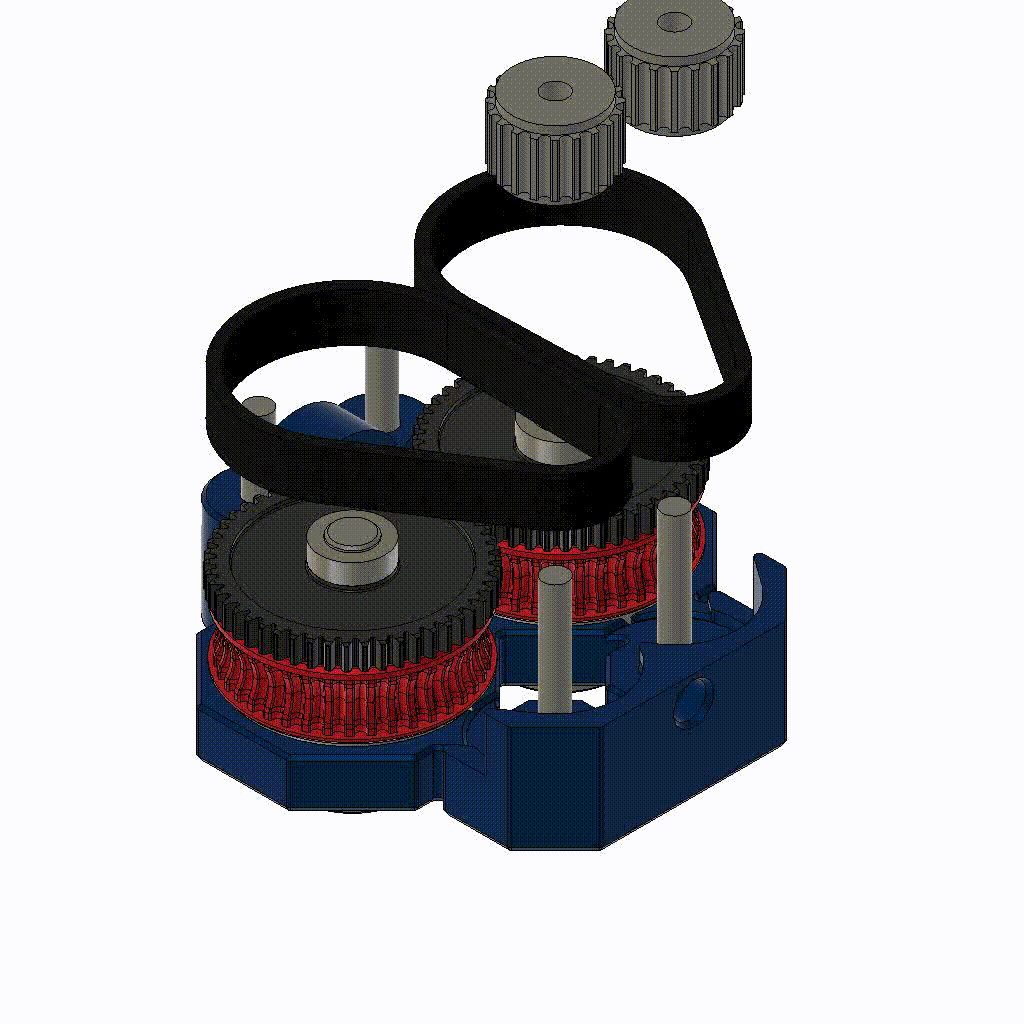
If you haven’t done yet lay the belts around the DriveGears and align them with the bottom screws. Remember that you have to take off the flages of the 20T idlers.
Slide the 20T idlers on the M3 screws. It might be a little tricky to get them on there – it helps a lot of you rotate the 2_DriveGear.stl while slightly pressing the 20T down. This way the belt moves and meshes up with the teeth of the 20T. You don’t have to align this perfectly now, that will happen on its own once it’s assembled.
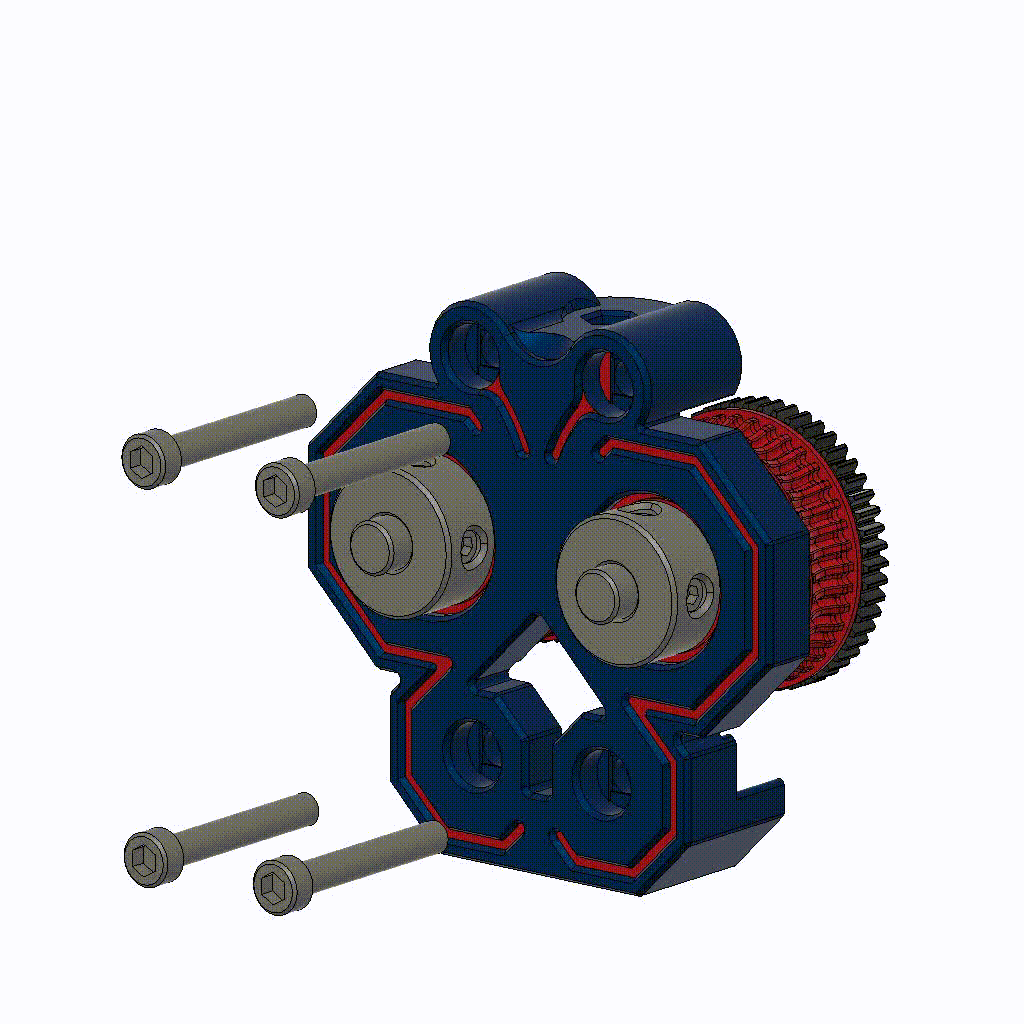
Step 11: Final Assembly
Yes, I agree with you this step is also a little tricky, but easy to do with the right technique. Rather than trying to press both sides together, angle the assembled front down a bit. Then position the bottom M3x16mm screws in their holes, once they’re in there bring the rest of the extruder up and guide the BG shafts into the bearings. Slightly tighten the M3x16mm screws so it can’t fall apart and spin the 50T gears by hand to see if everything runs smooth.
Step 12: Adjust the Motor position
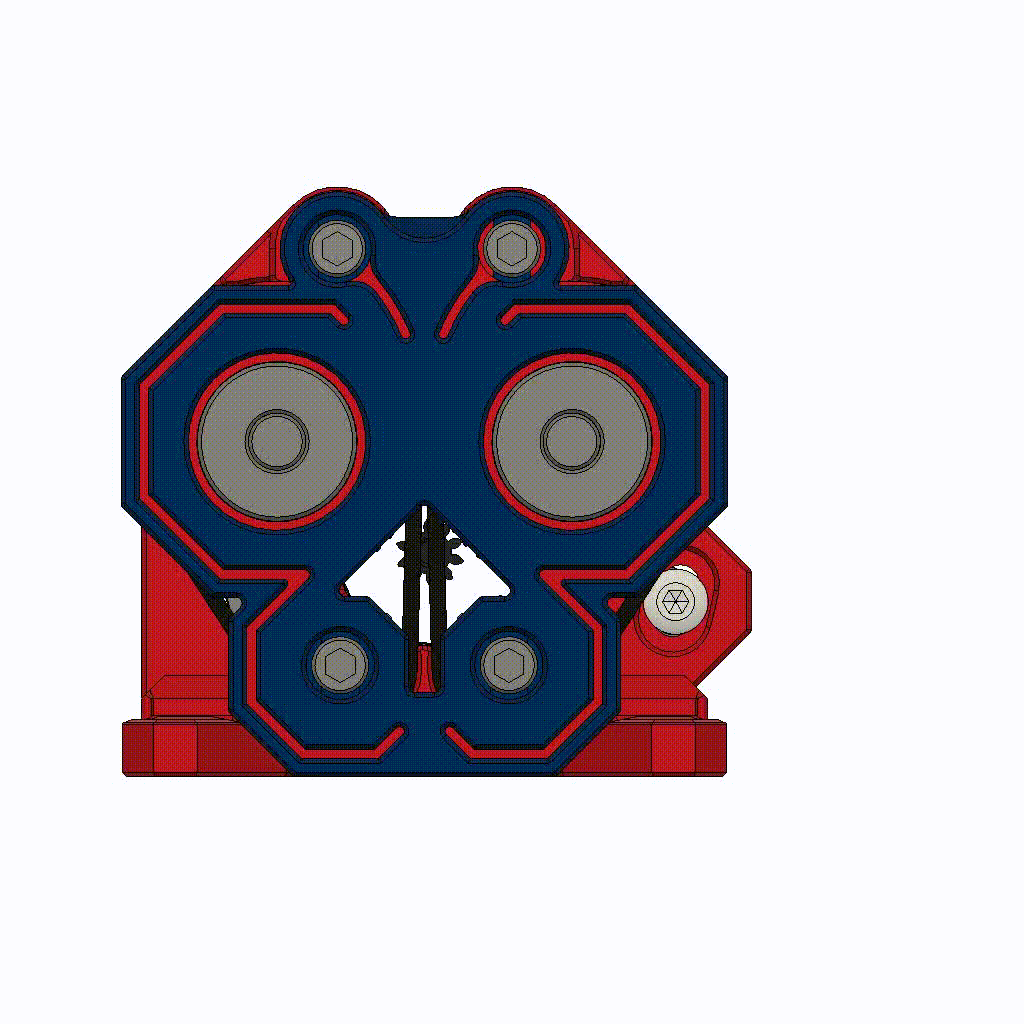
Once everything is in place and runs smoothly tension down the M3x16mm screws – Make sure that everything runs smoothly. Over-tensioning the bottom screws might break the bottom 20T idlers – just find the sweet spot of screw tension. The last step is to adjust the Gear meshing between Nema and the 50T Gear. Loosen the right M3 BHCS if needed to rotate the motor left and right. Adjust it so that the Gears have a nice meshing but not being too tight – a very tiny backlash would be perfect.
And that’s it – The Papilio is build! Congratulations!
I would be happy if you share your build with us on the Discord 🙂