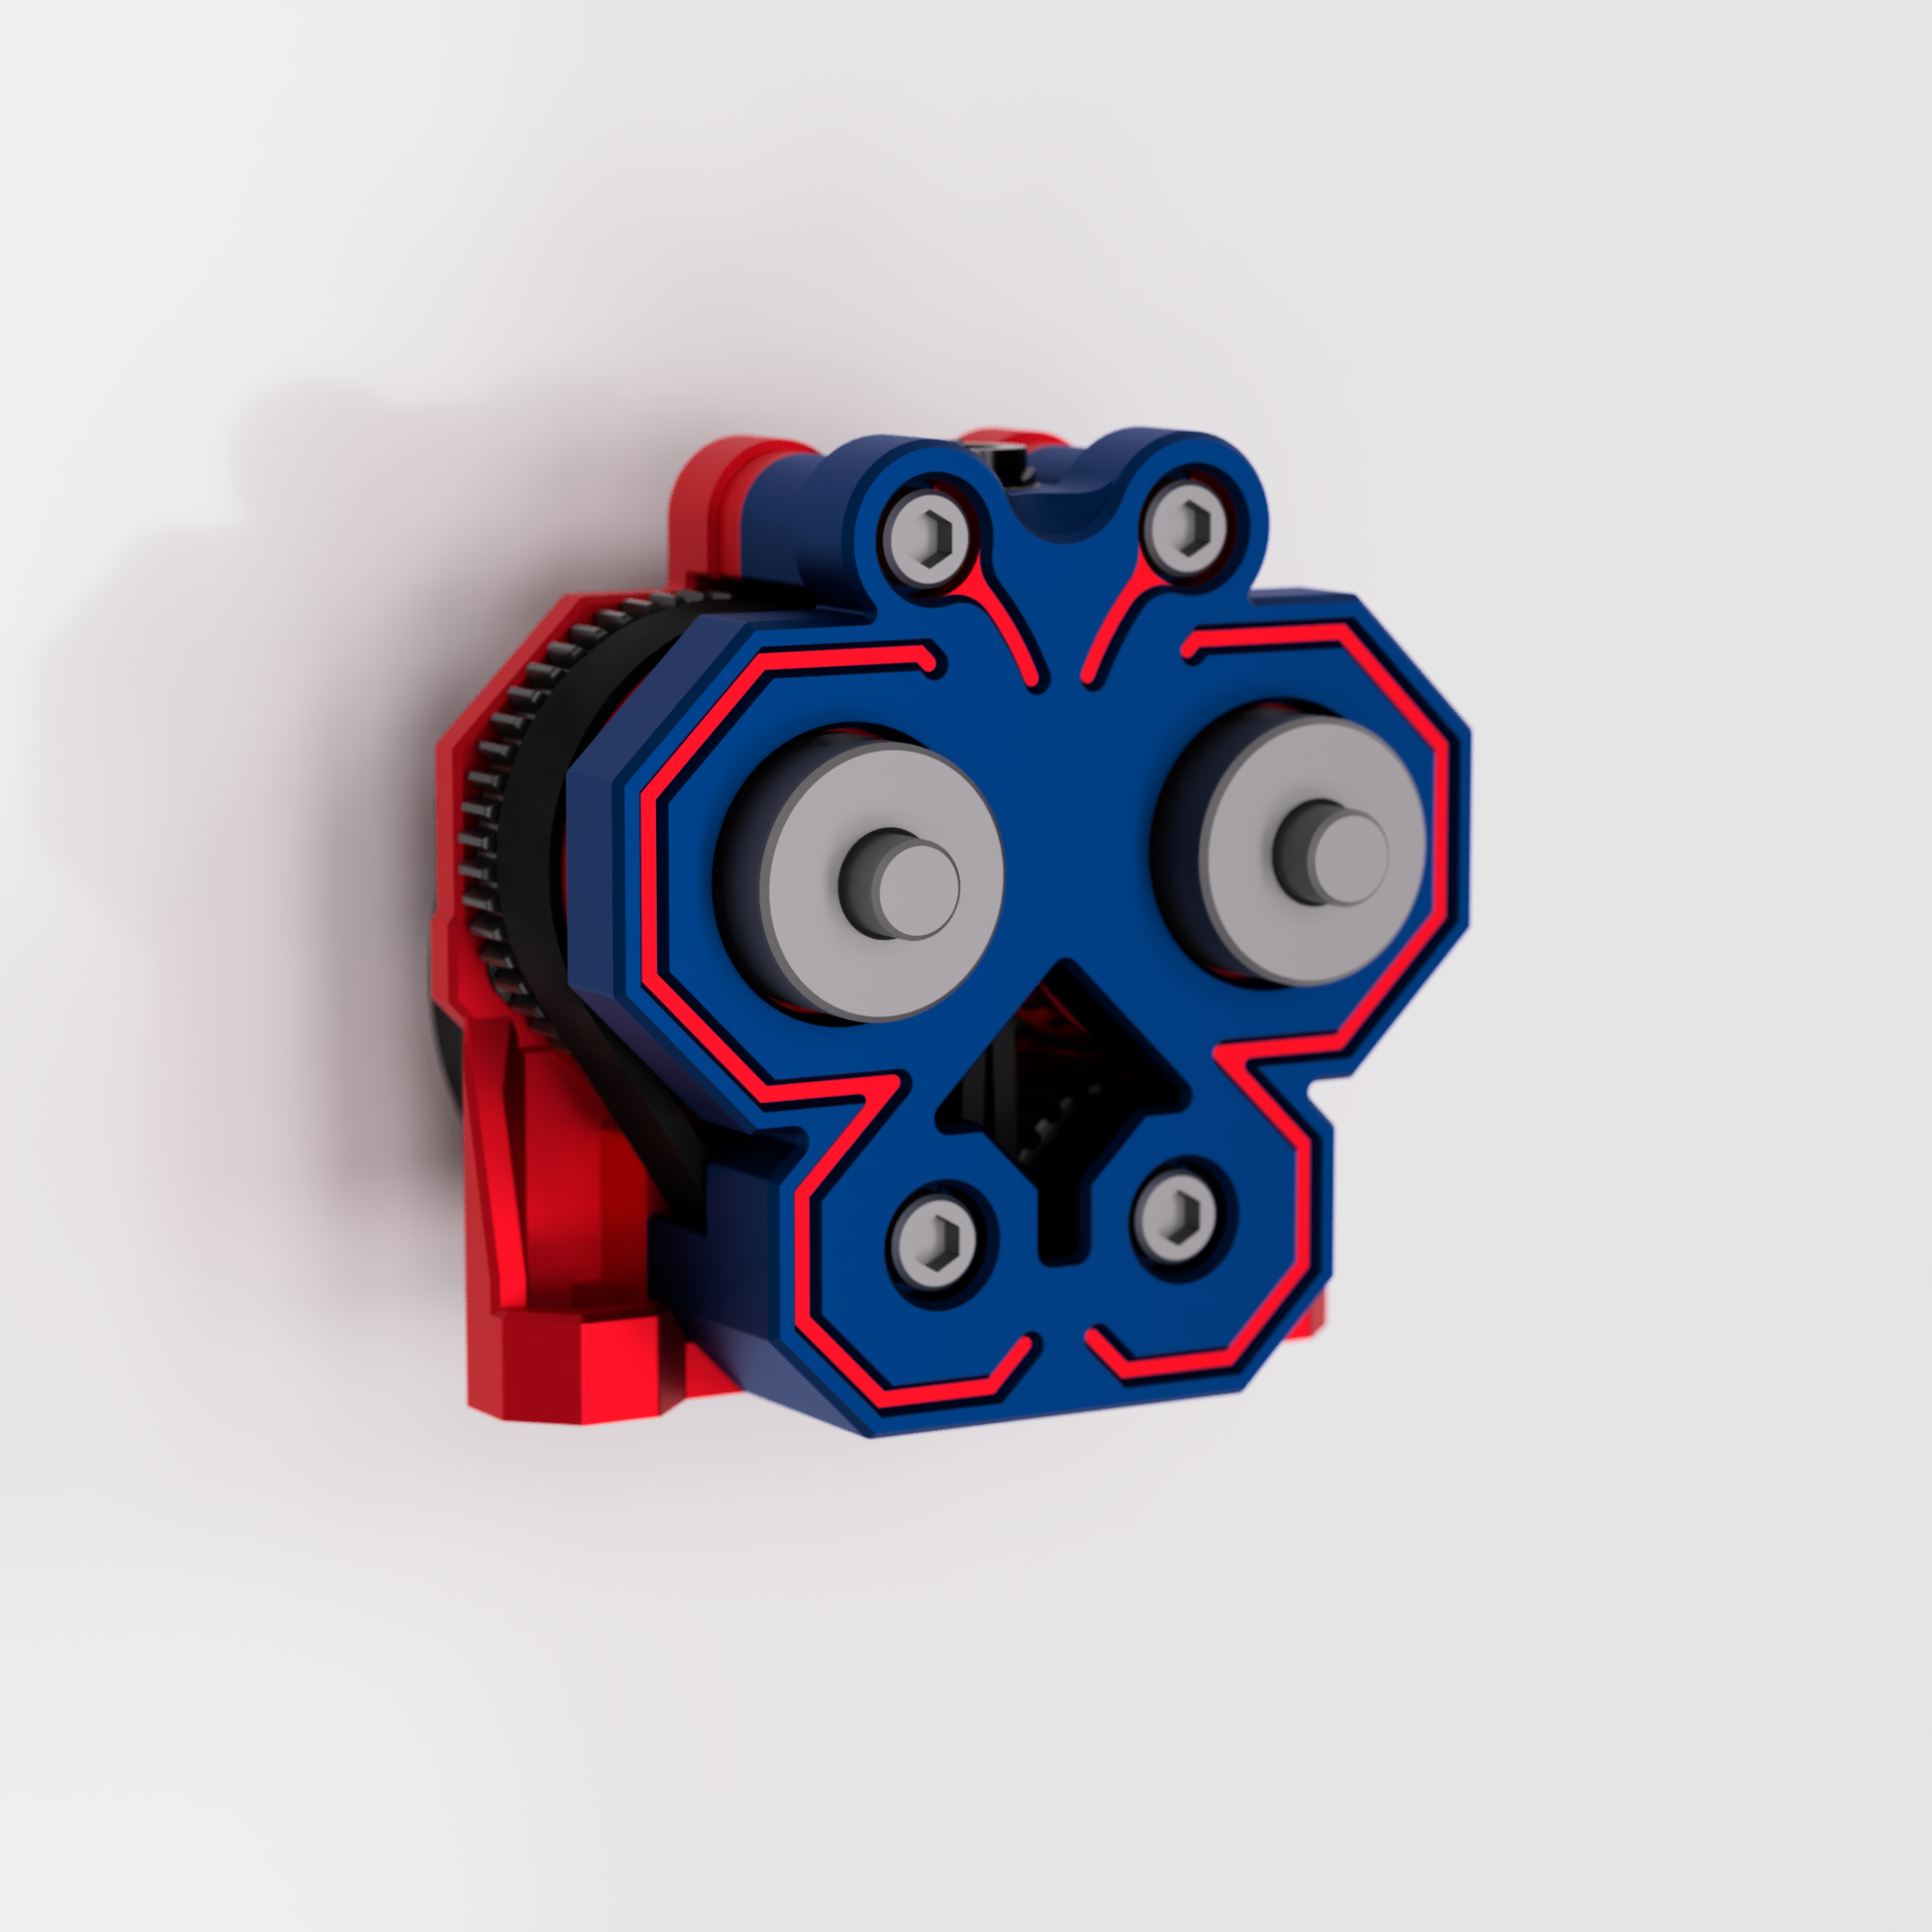
The Papilio
A Belt-Extruder
Current state: Open Beta Testing
STLs and build instructions are linked further down.
But first let me tell you a bit about the how and why:
A Belt-Extruder, what is that?
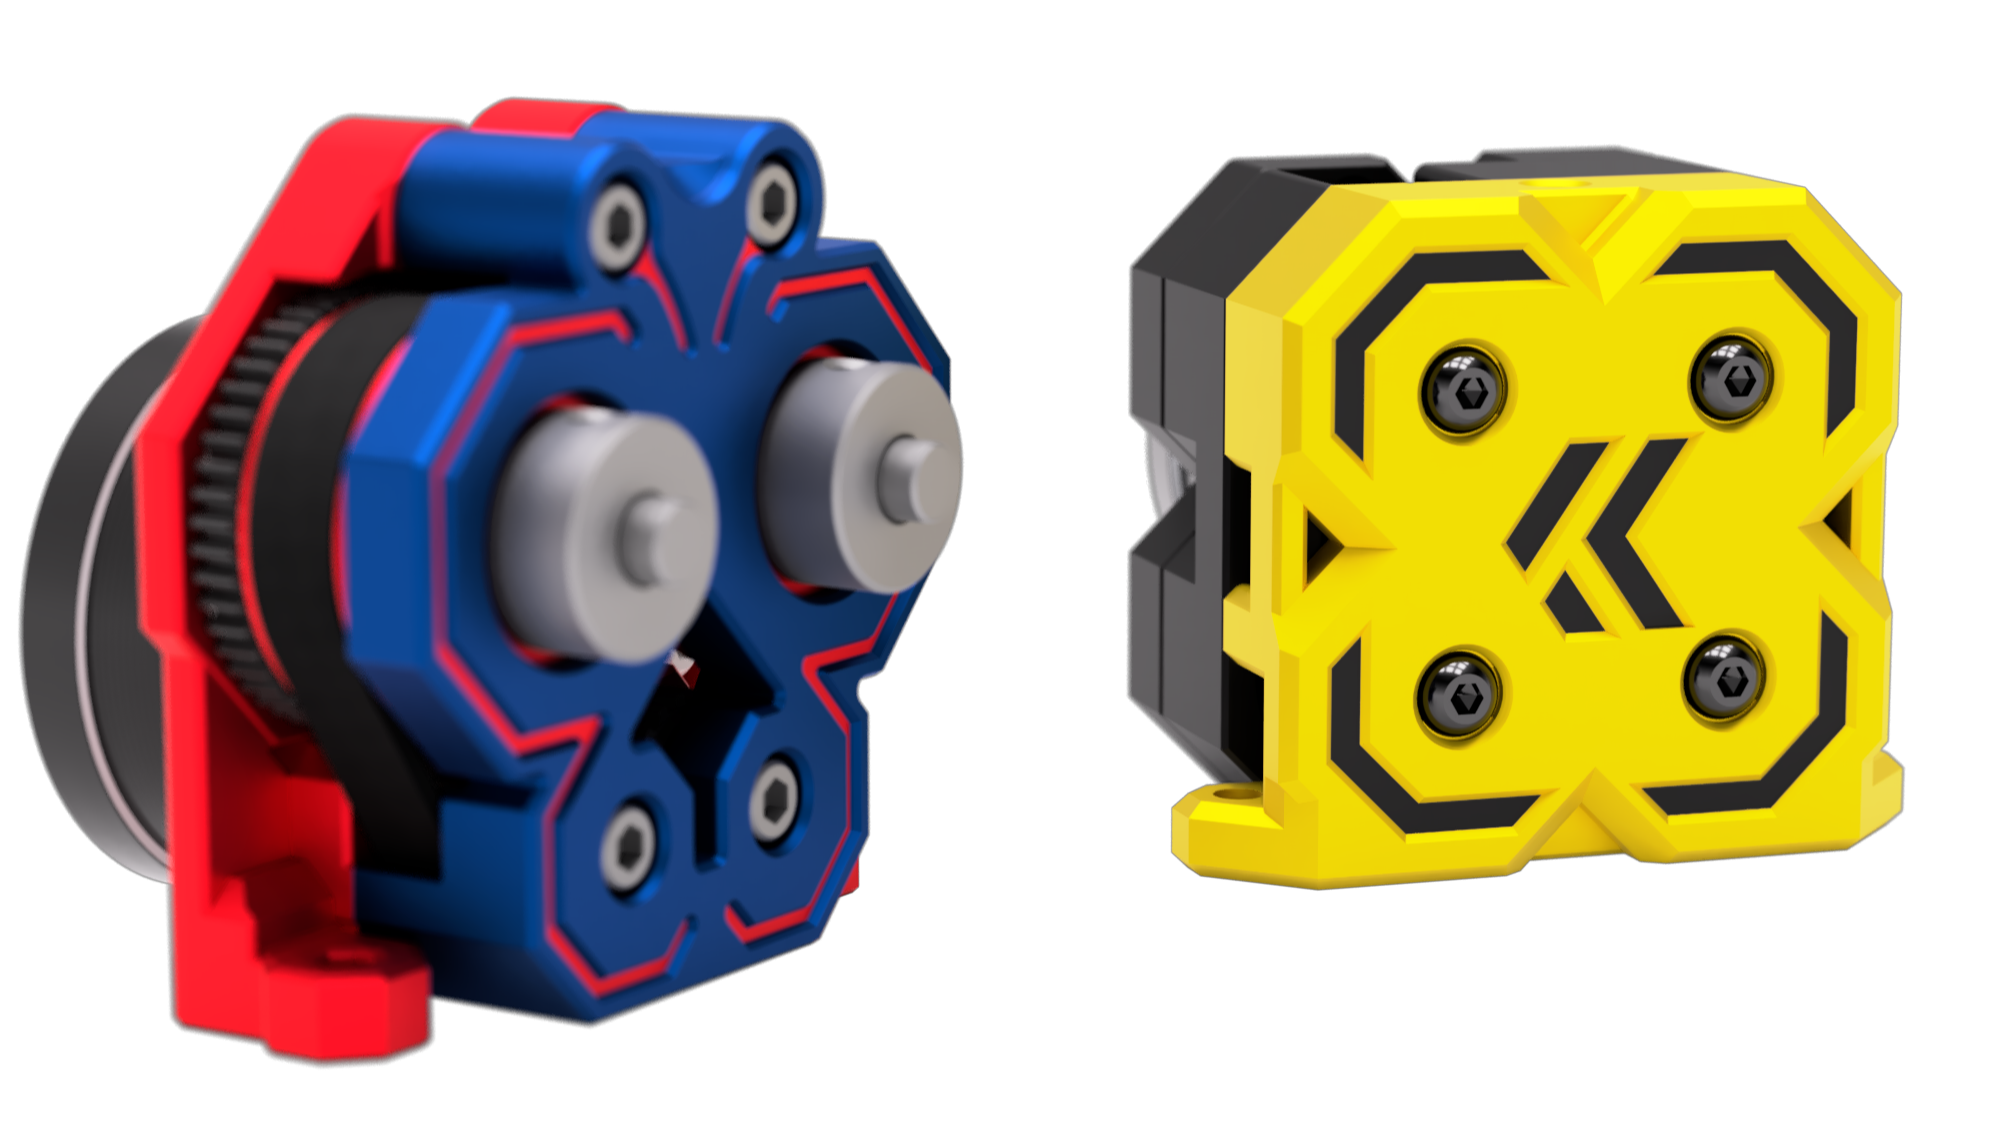
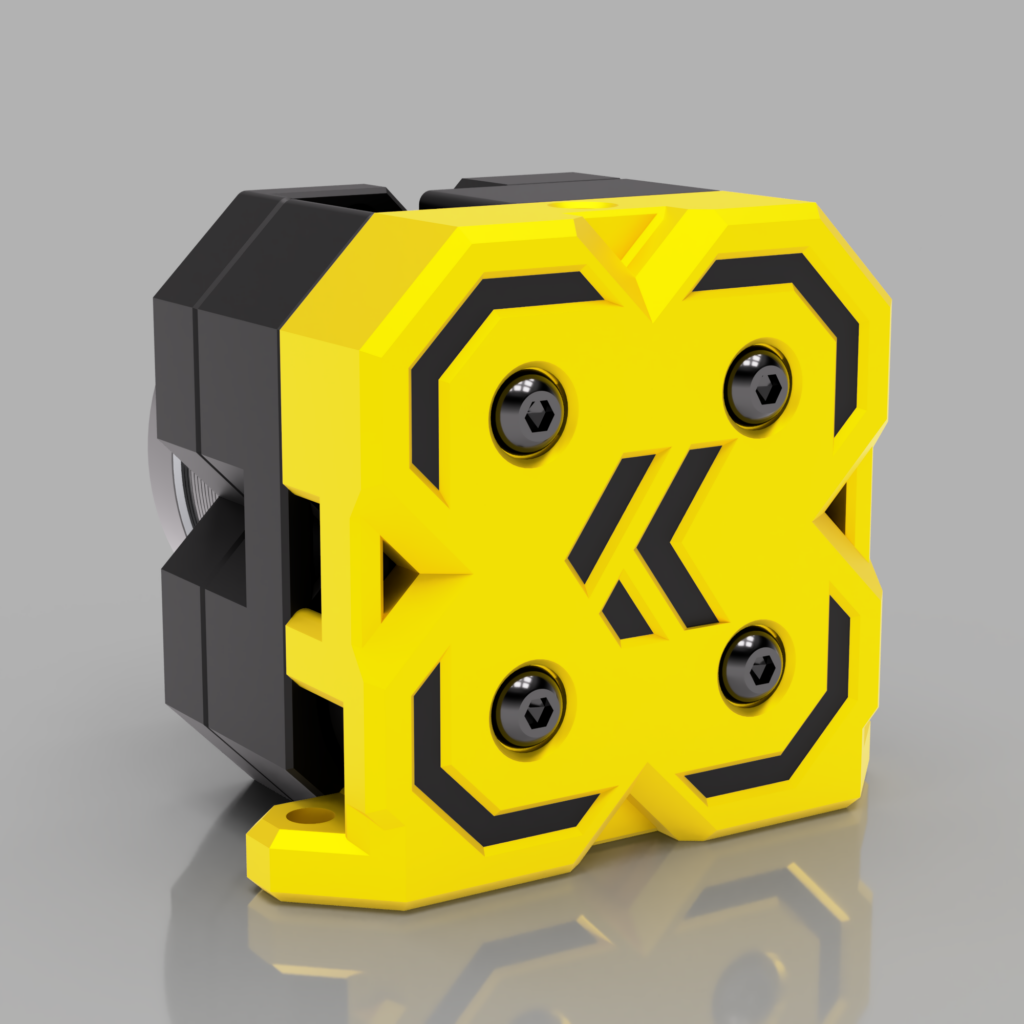
No metal teeth biting the filament, but soft rubber belts pushing the filament down to the nozzle. This is the concept of the Papilio: A Belt Extruder which uses regular rubber timing belts instead of metal extruder gears to feed the filament.
You may wonder why we need an extruder that uses belts instead of gears? Guess it’s fair to say, that we all know the woodpattern on flat surfaces or the small bites on the filament when the metal gears grab the filament. With the belts there are no metal teeth damaging the filament, but soft rubber belts pressing against the filament guiding it all the way through the extruder into the nozzle. As all my projects the Papilio is an 100% opensource project.
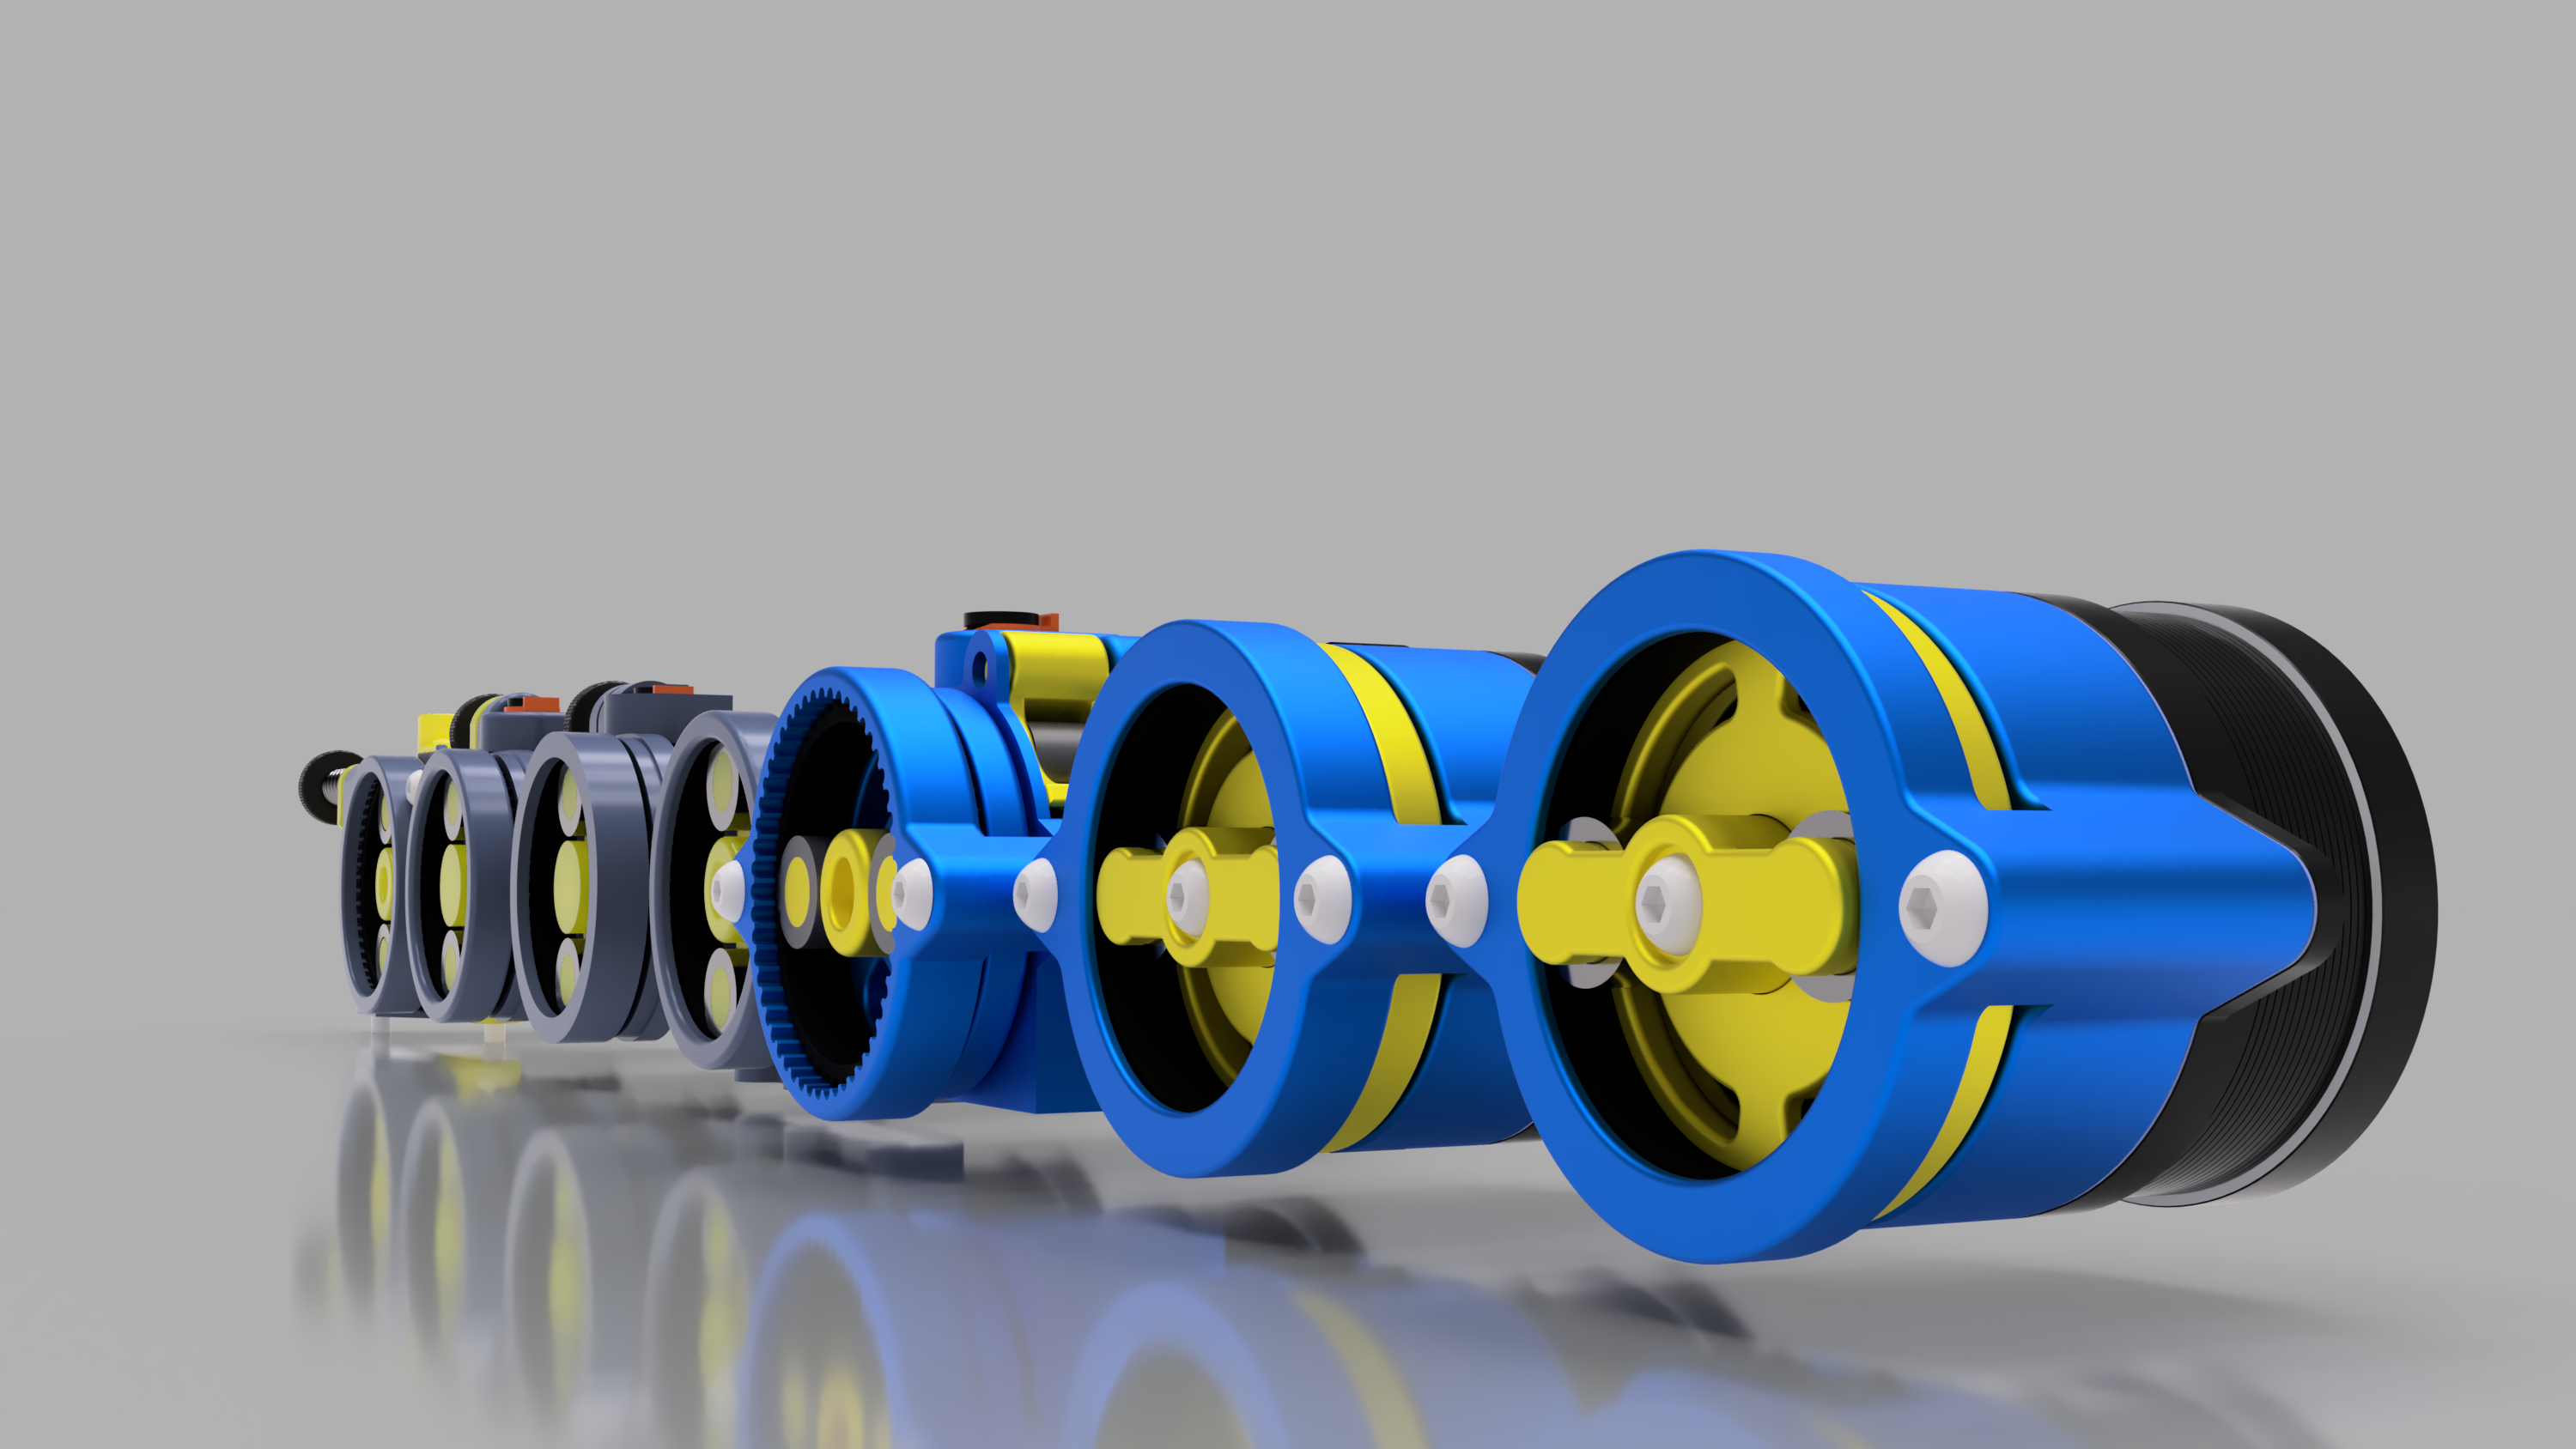
How does it work?
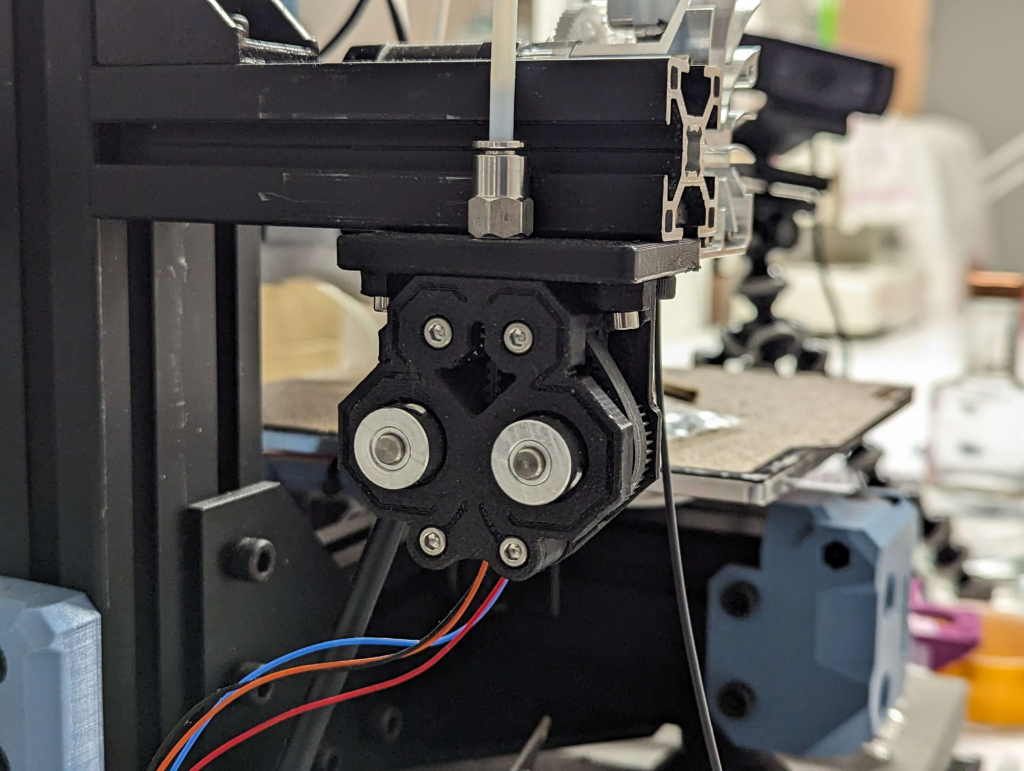
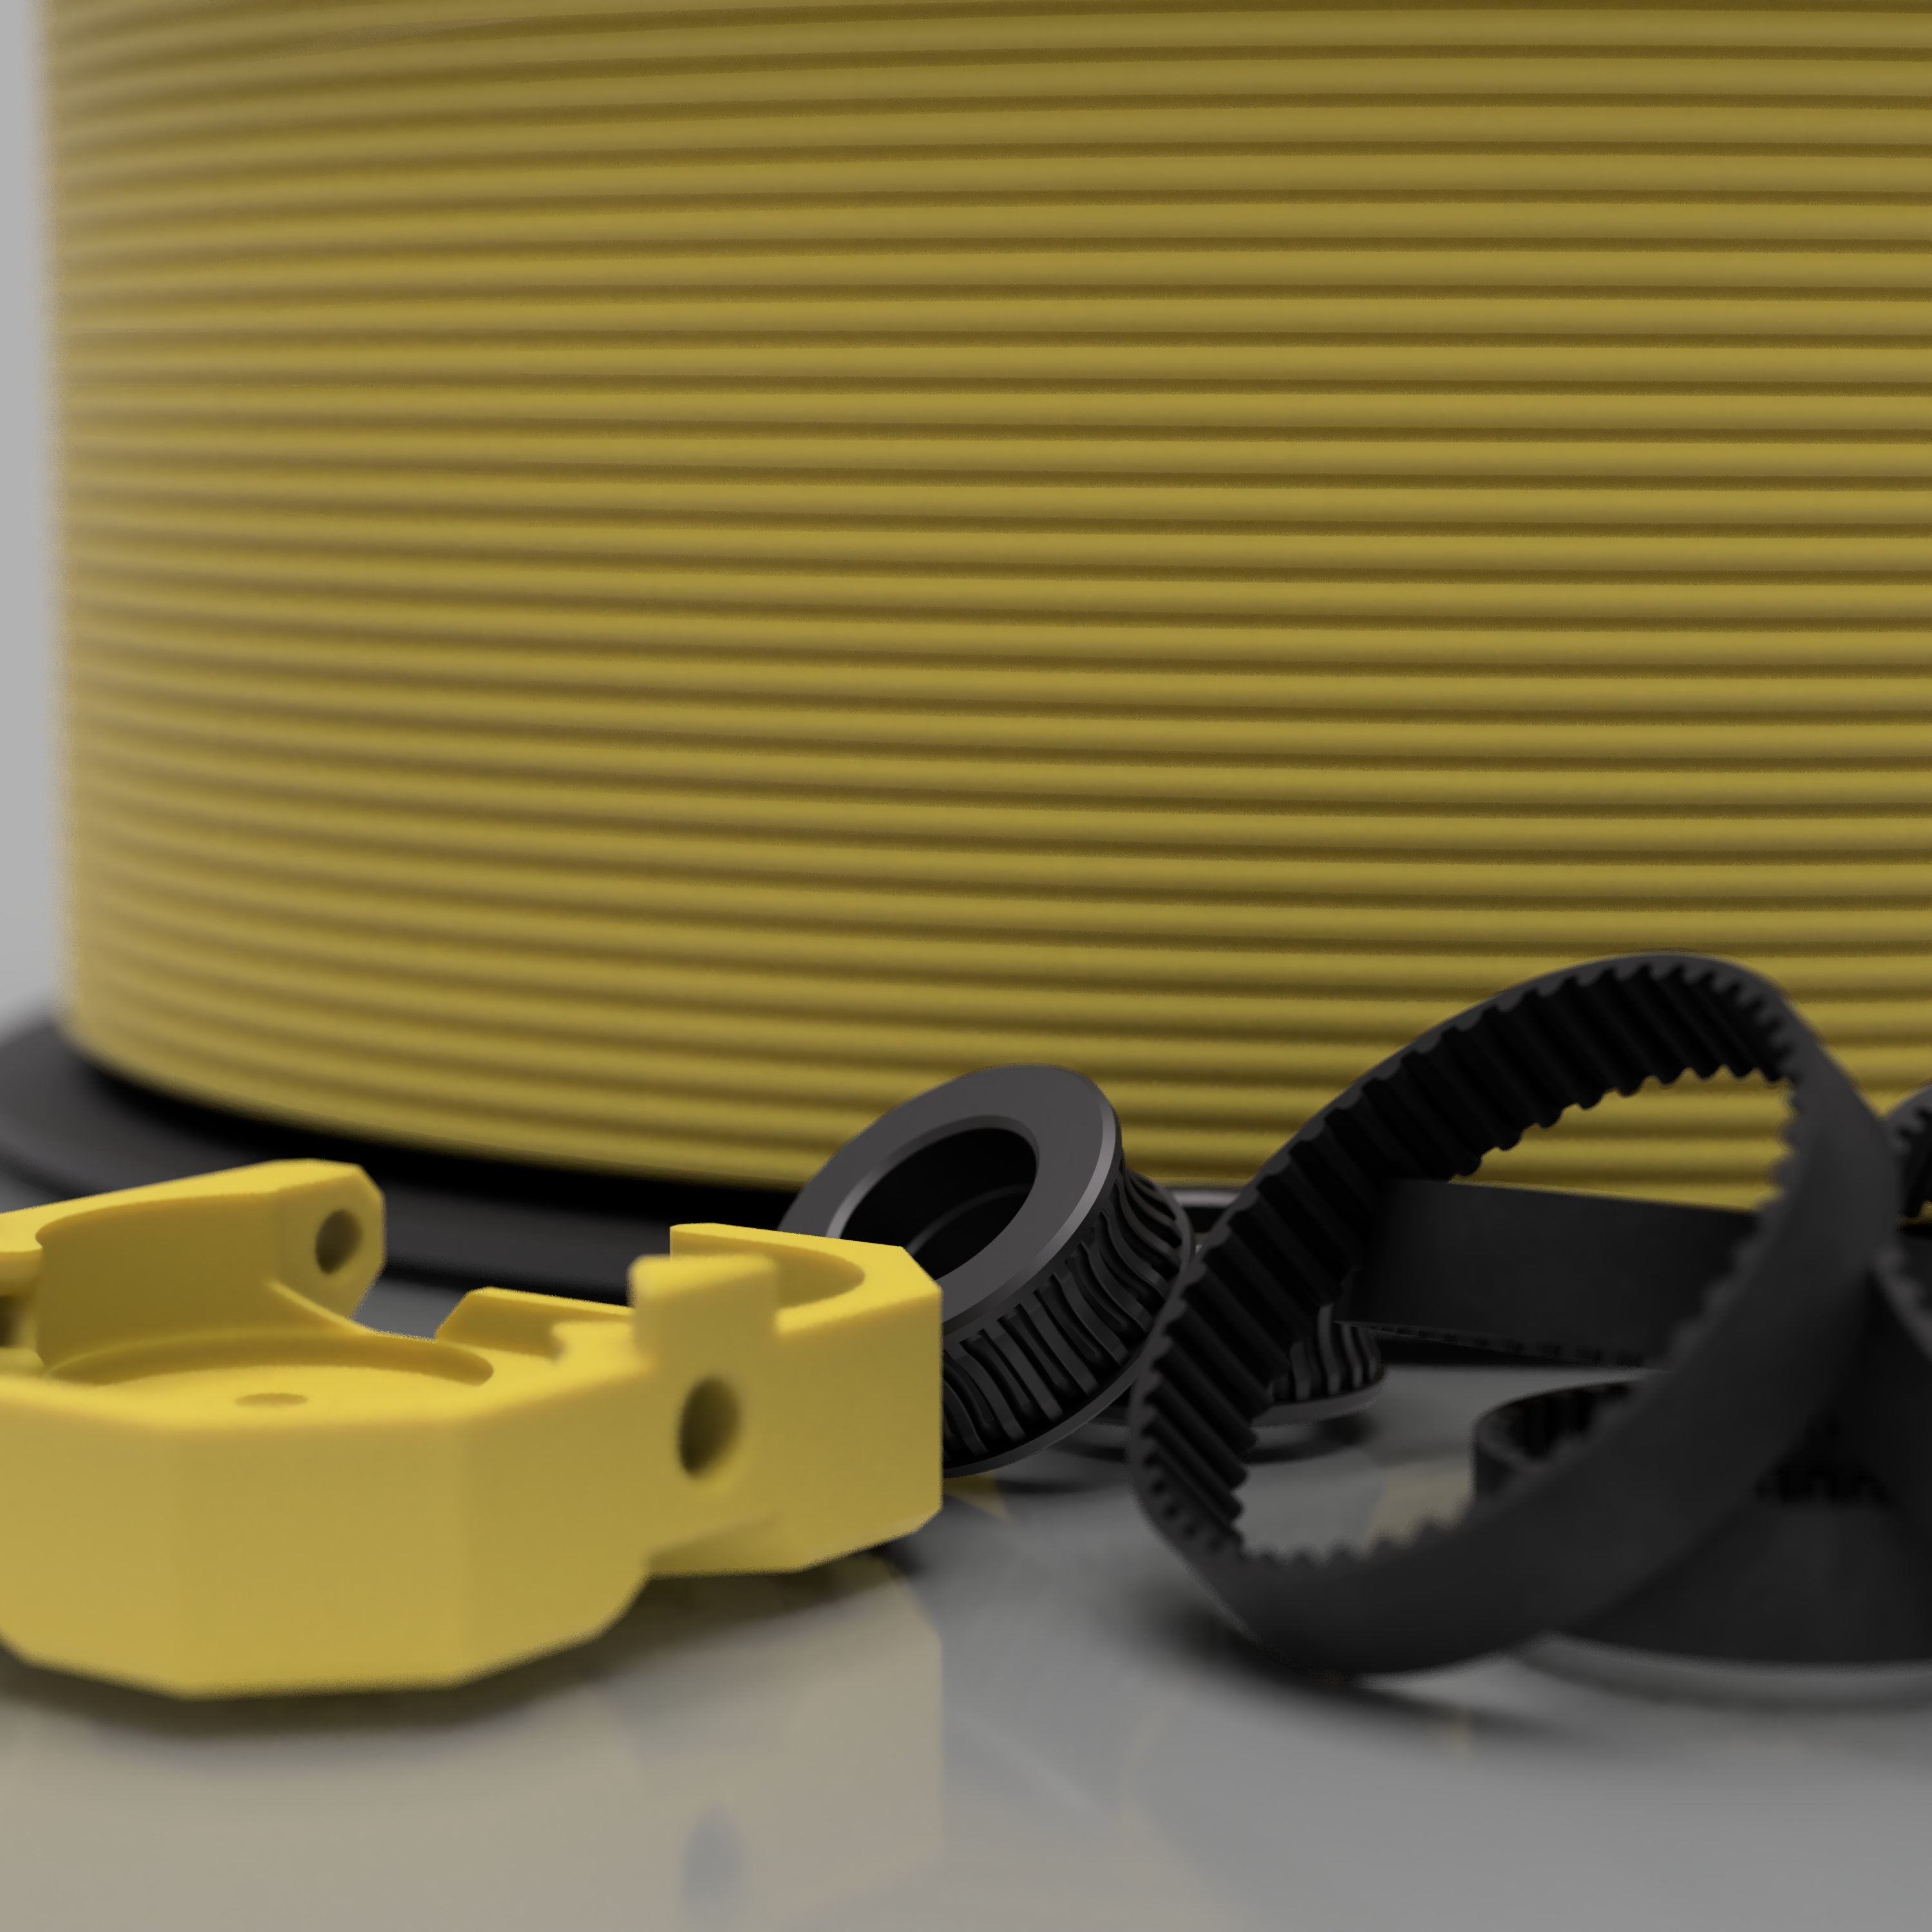
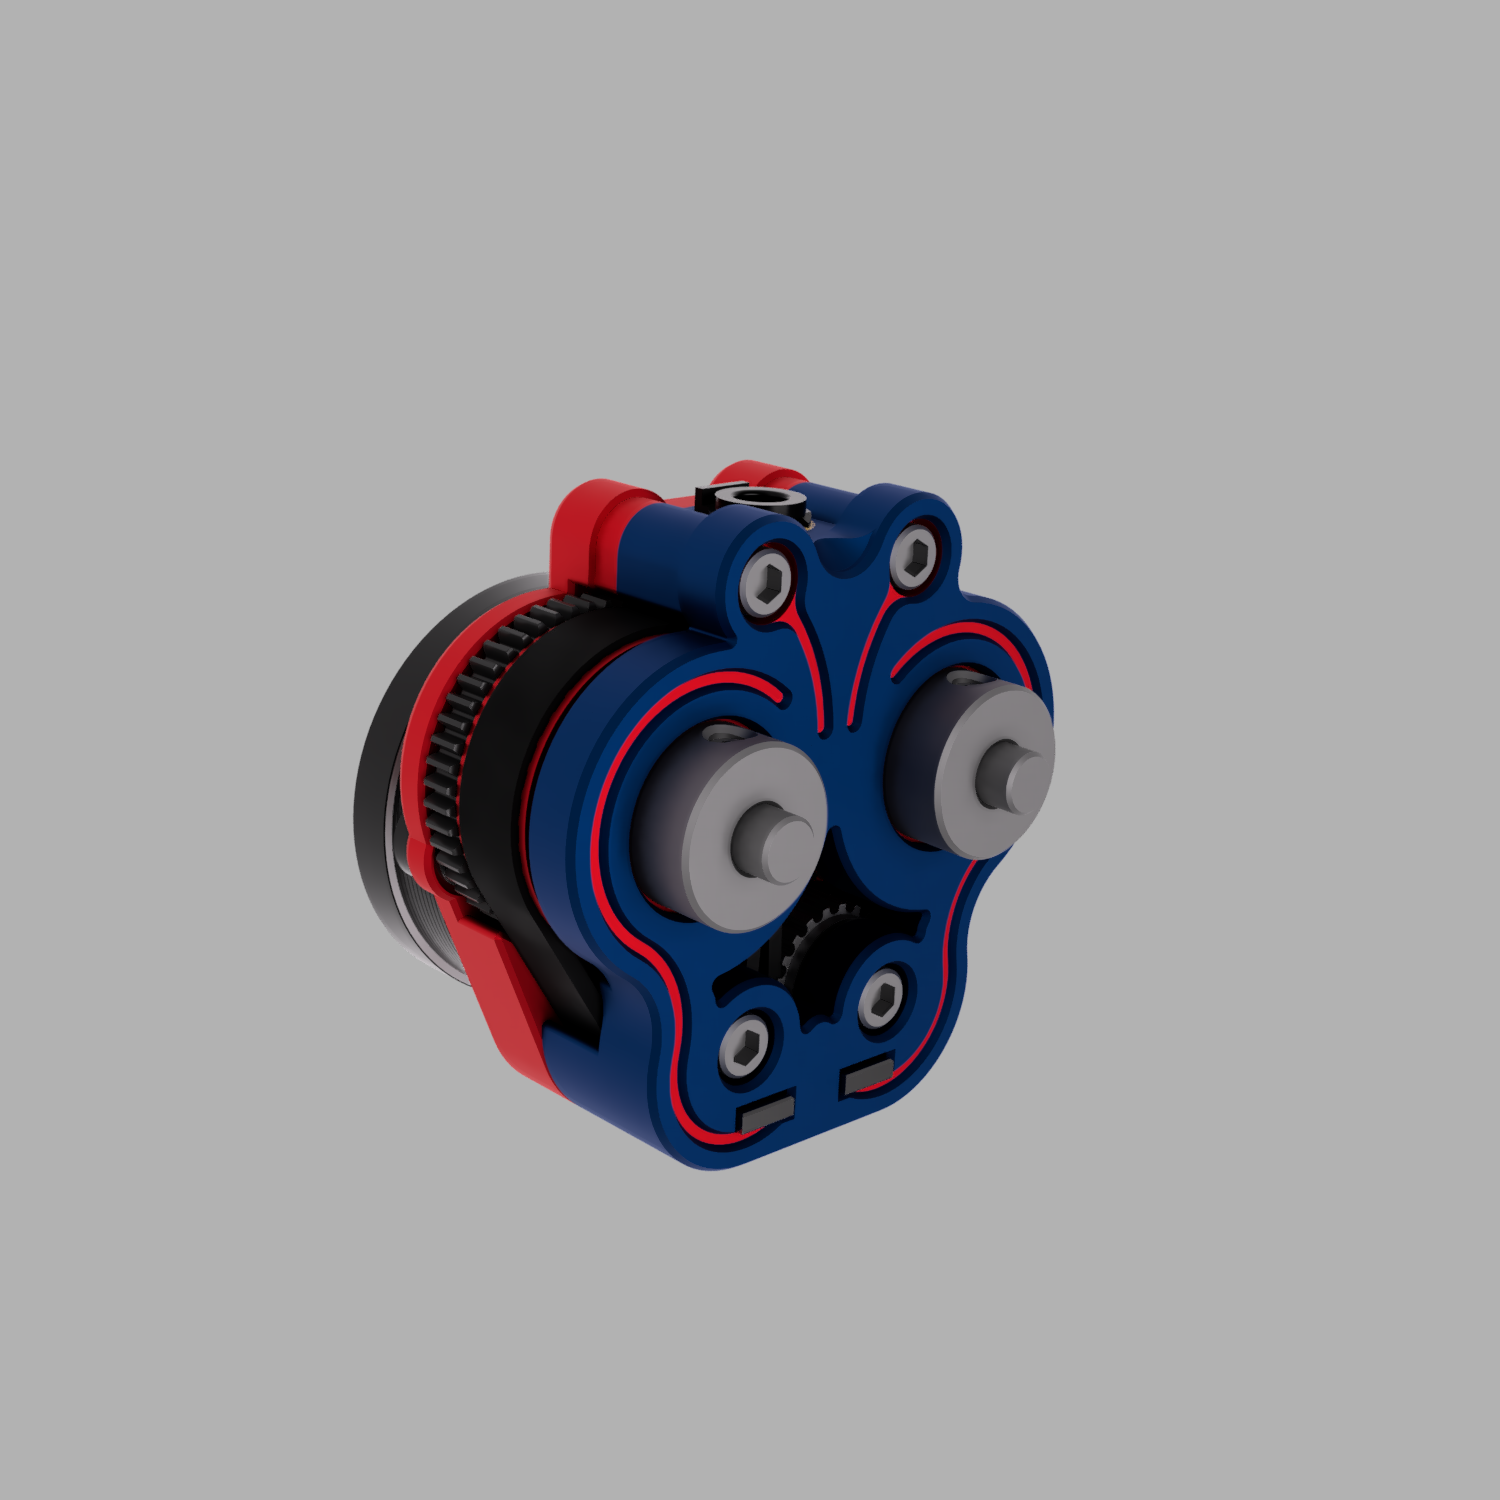
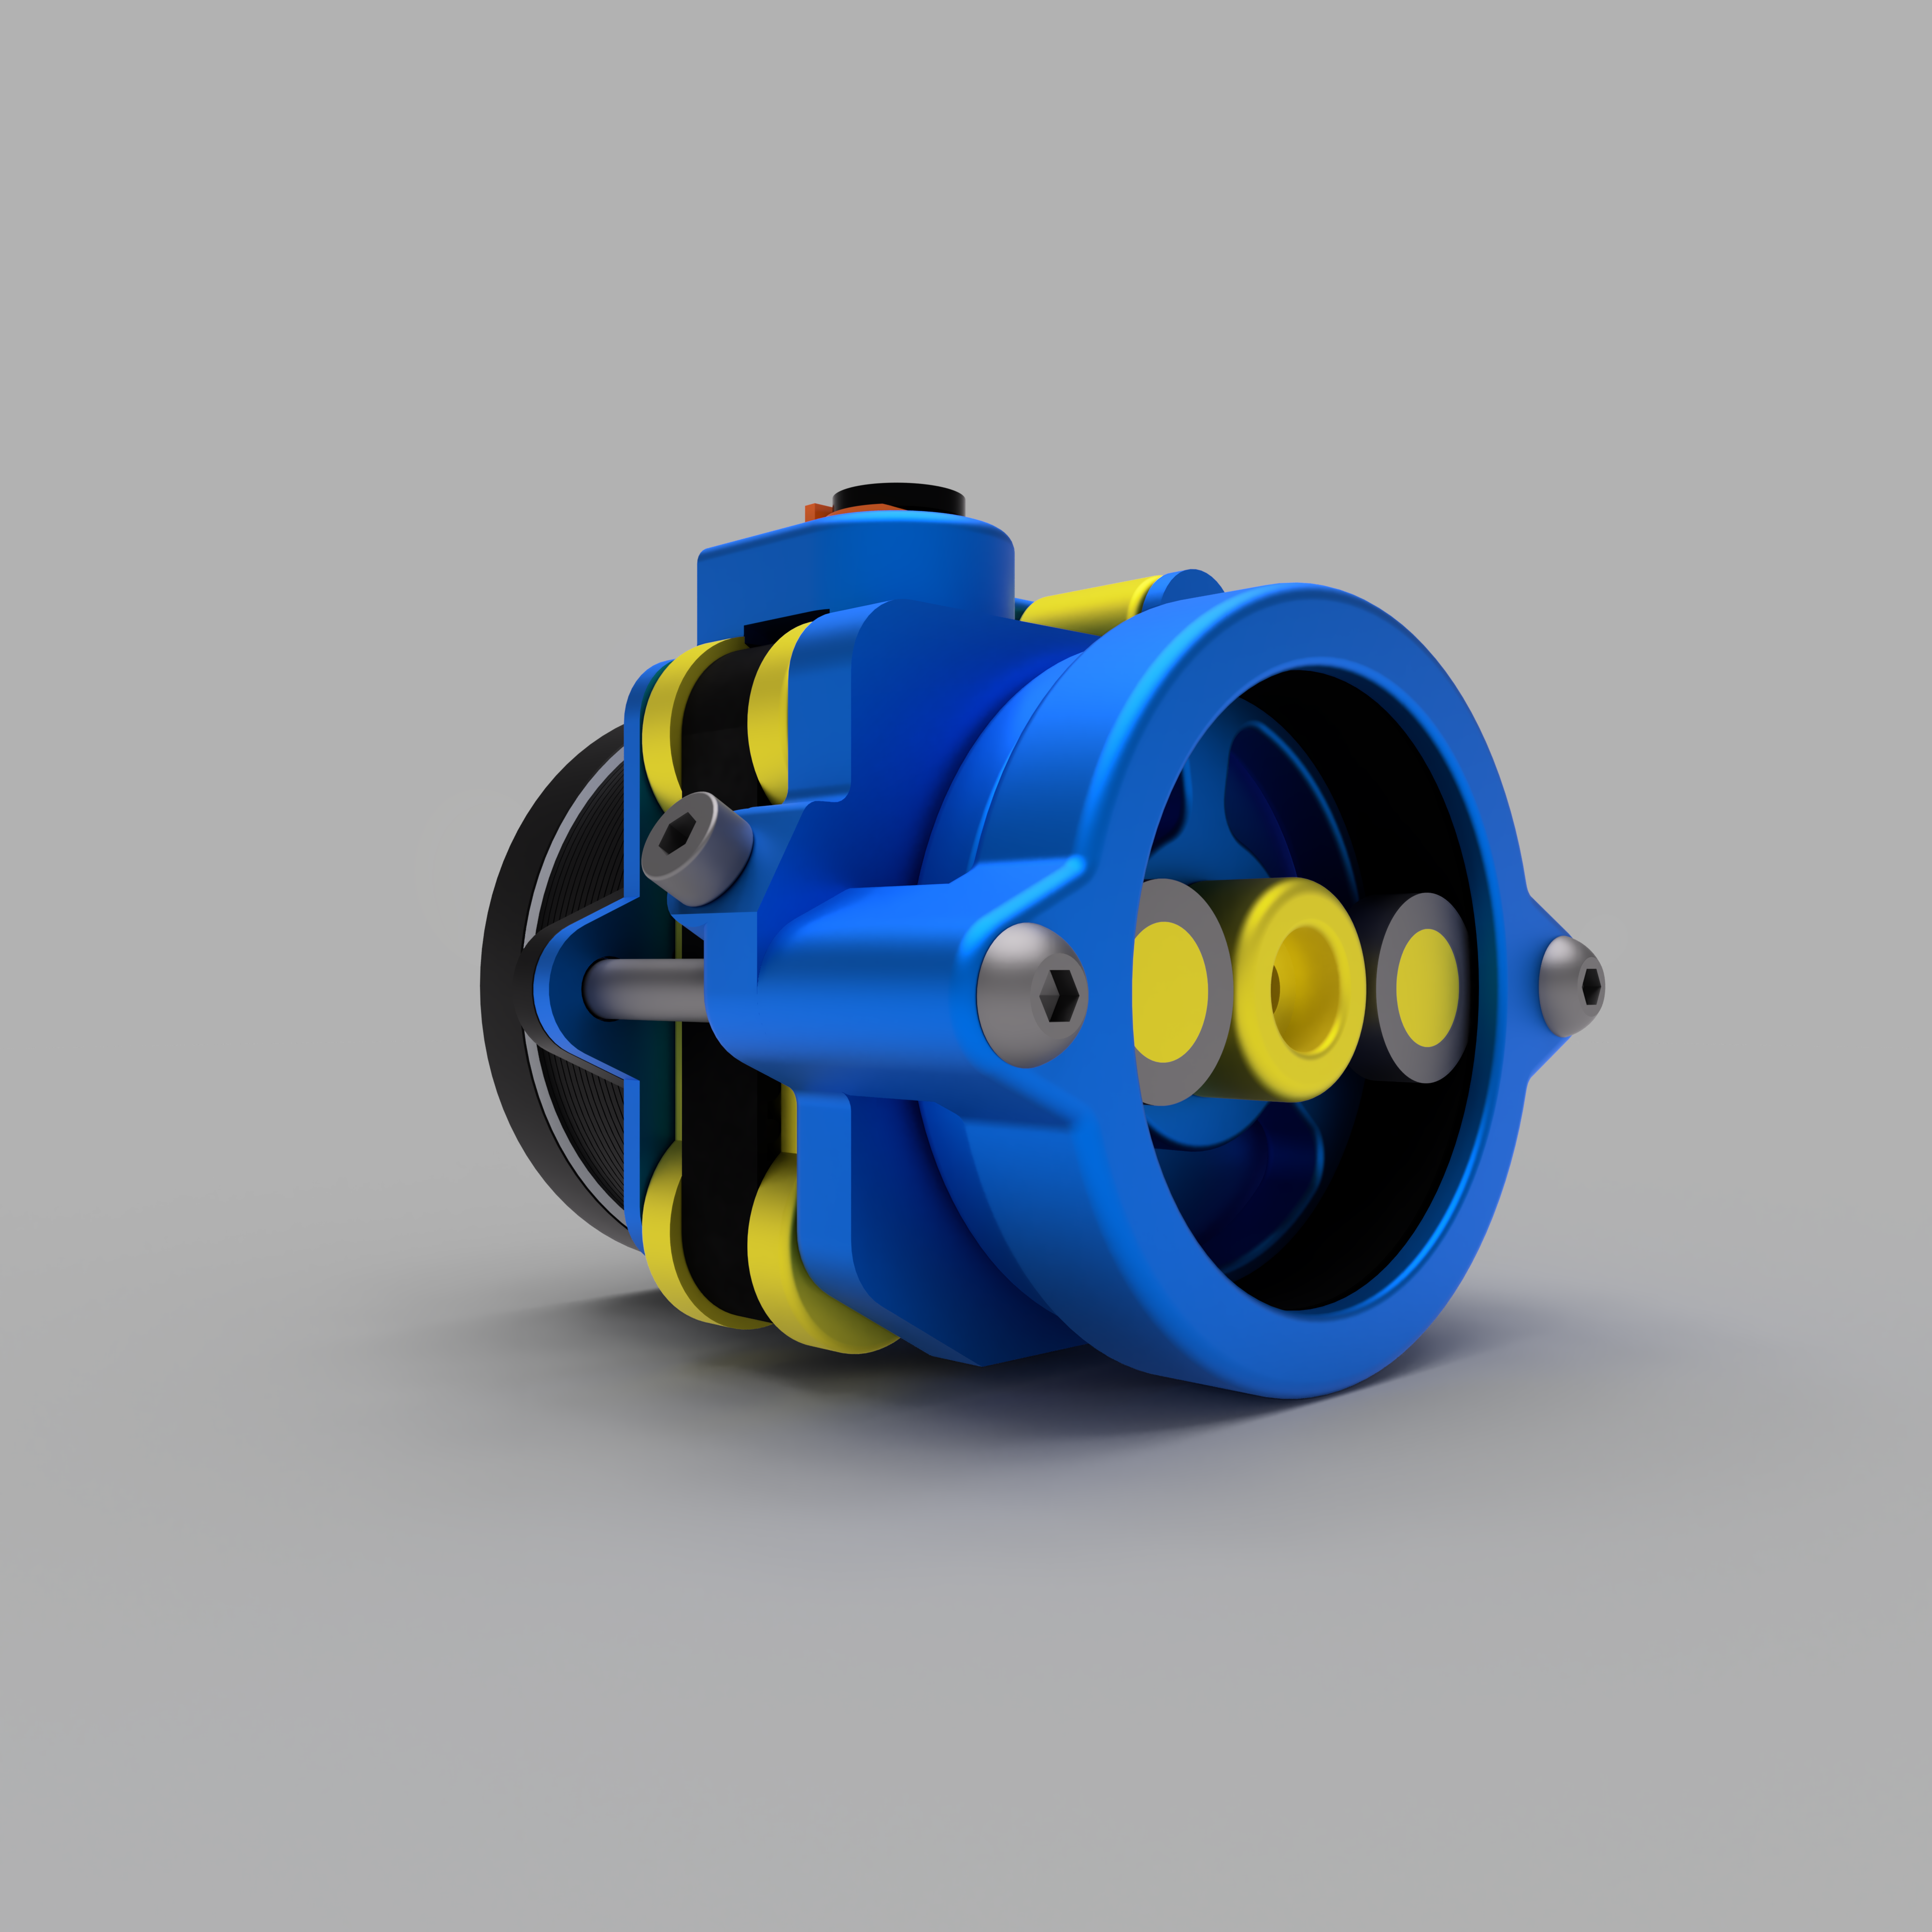
Powered by a Nema 14 the Papilio uses a gear reduction to drive two tiny 2GT looped timing belts. In order to keep everything as minimalistic and cheap as possible the Papilio uses very common hardware in combination with some printed parts. The Nema 14 doesn’t make it only super compact but also very light weight – only 140g! The mounting points are compatible with the ones from the Sherpa Mini allowing a combability with a wide range of toolheads.
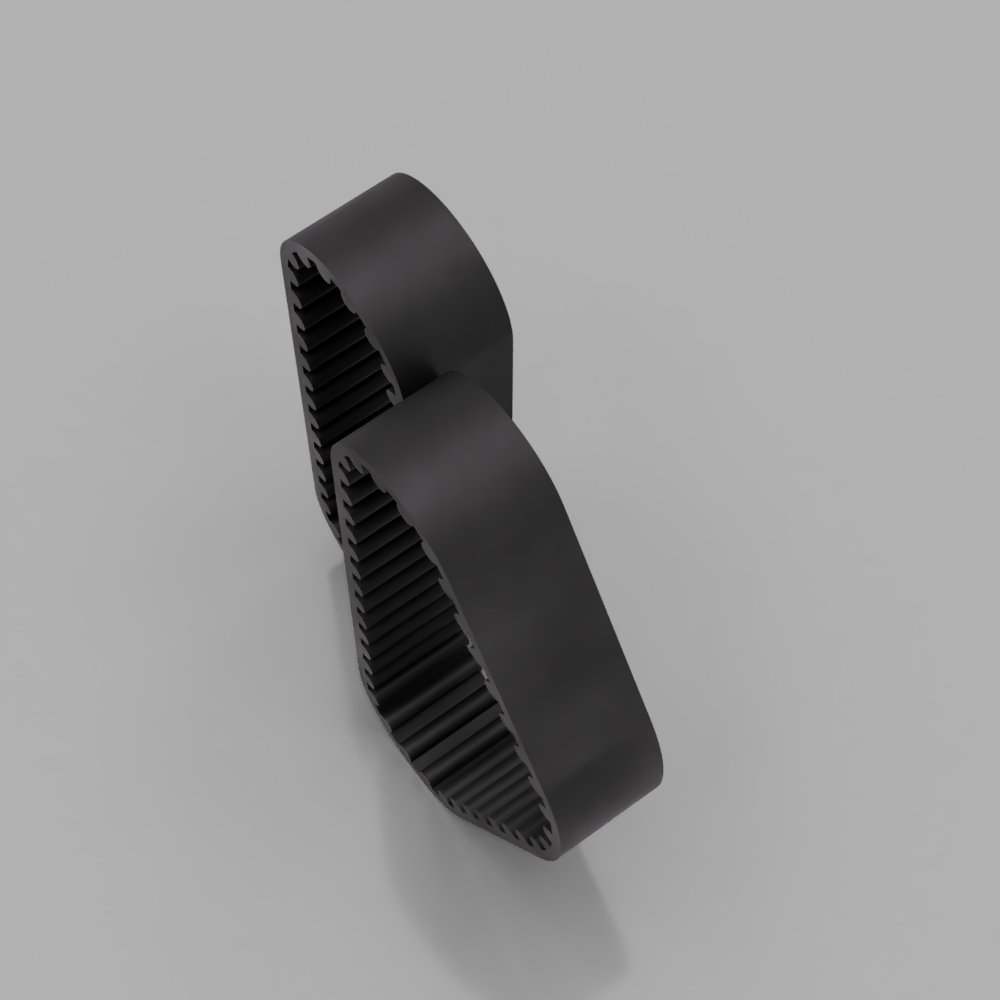
The Papilio uses a Dual-Drive System so the filament gets pushed on both sides by the two timing belts. Using some special shaped pulleys the belts get curved and can perfectly warp around the filament. This ensures a maximum contact to the filament for a very strong grip and keep the filament centered.
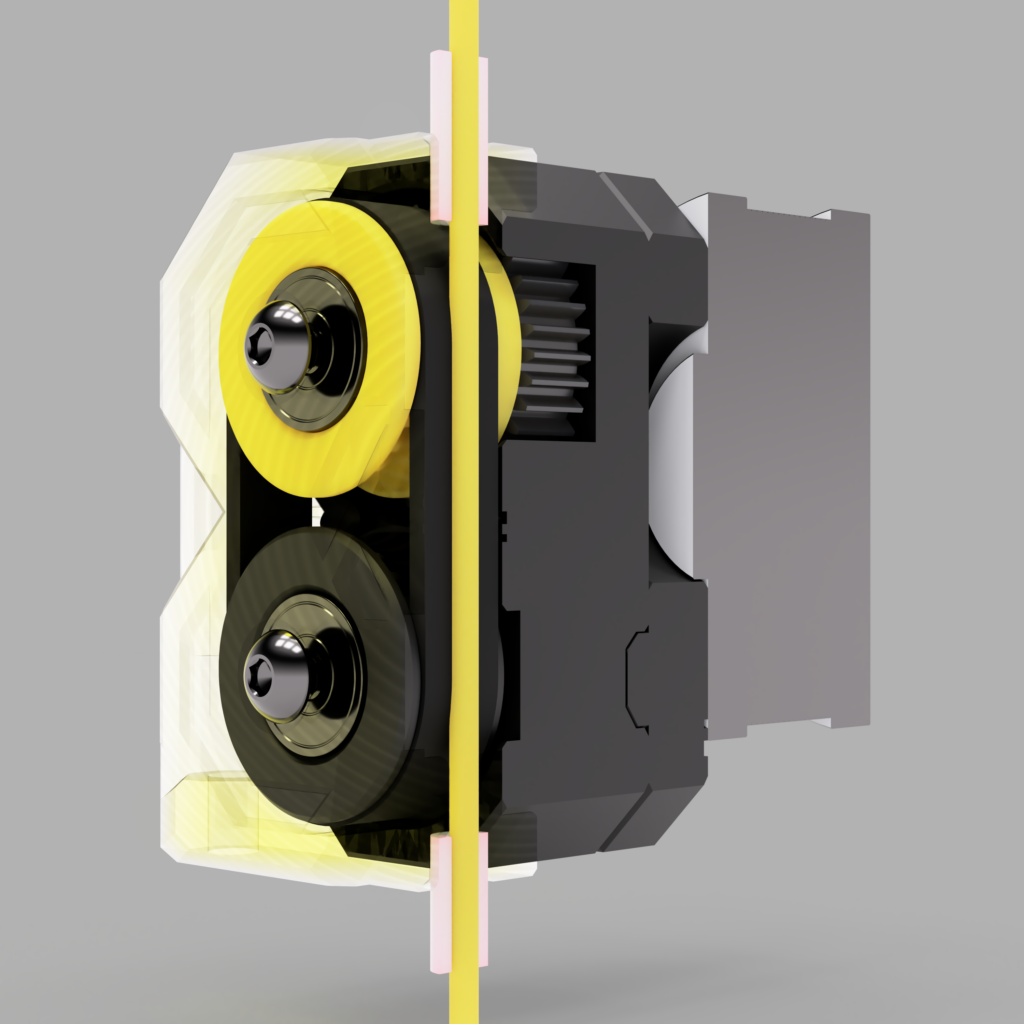
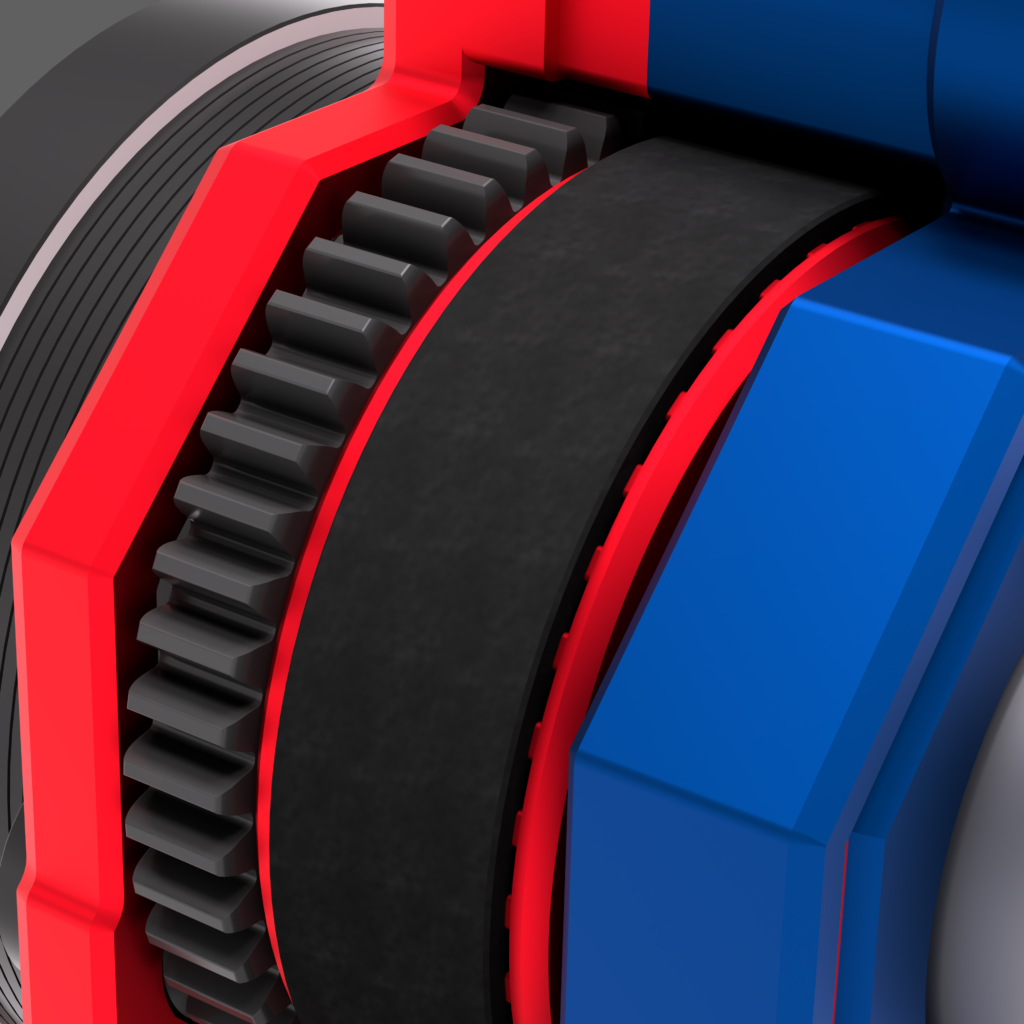
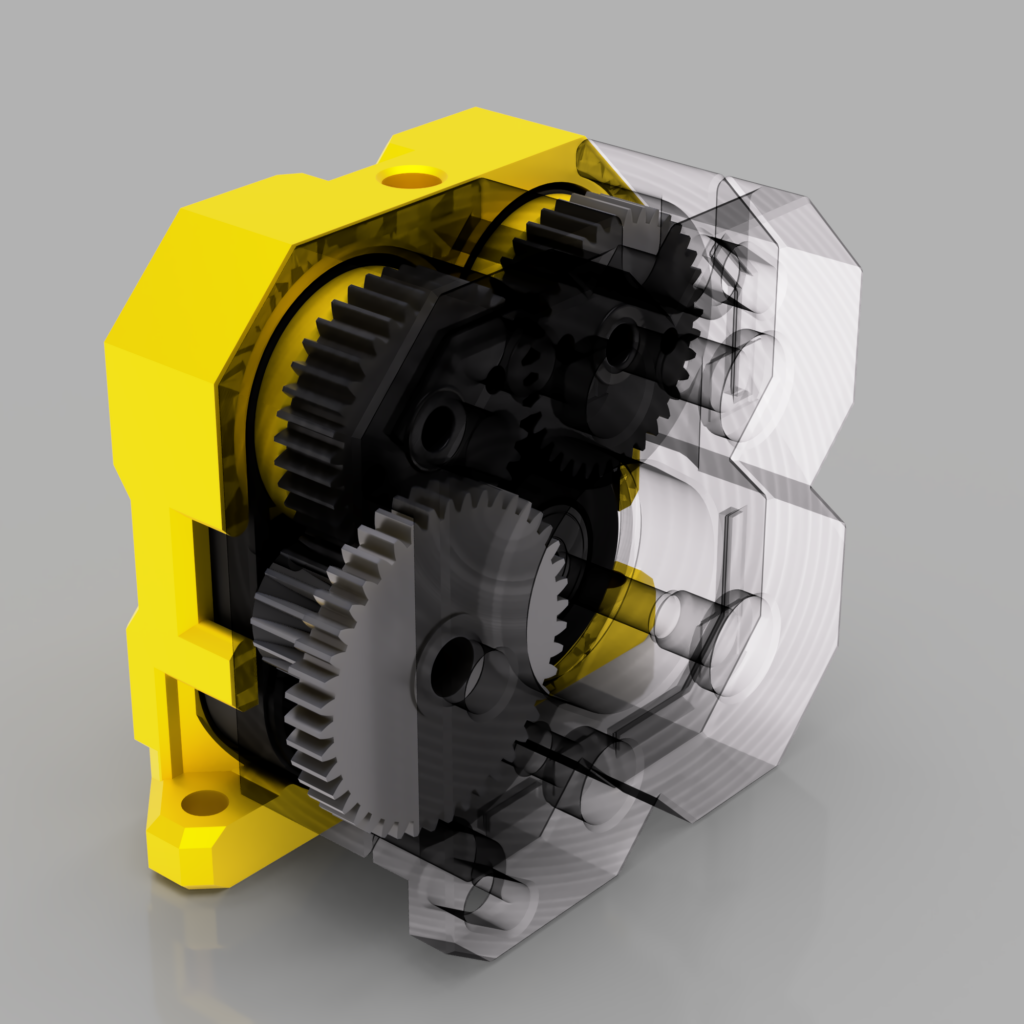
Take a look inside!
Thanks to Danni for this picture of a Papilio Lite with a clear front! Now you can see what’s going on inside!
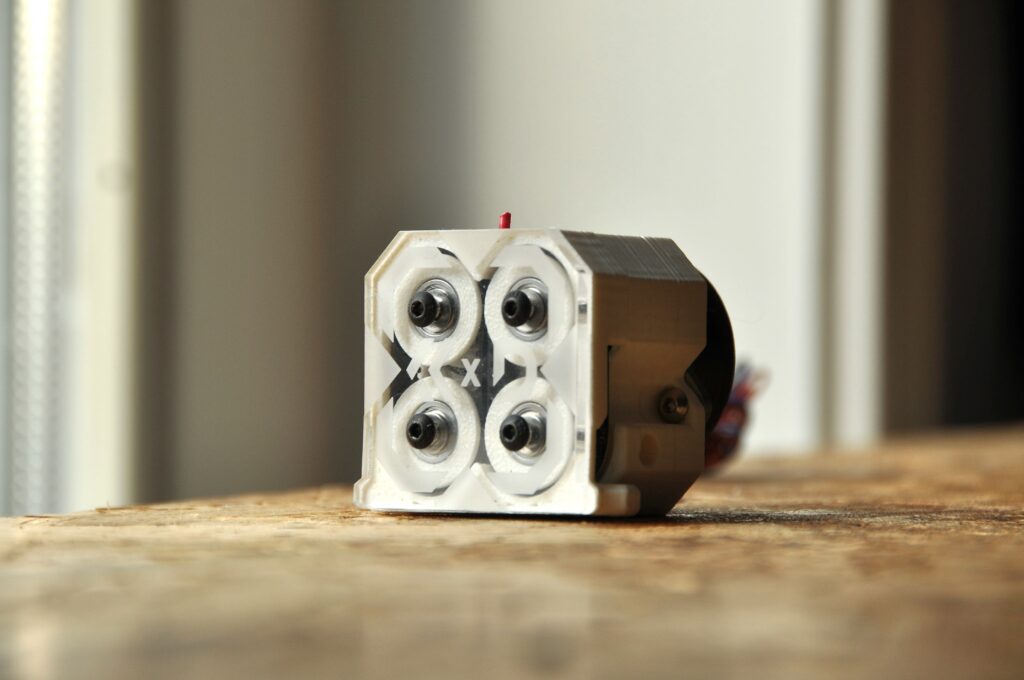
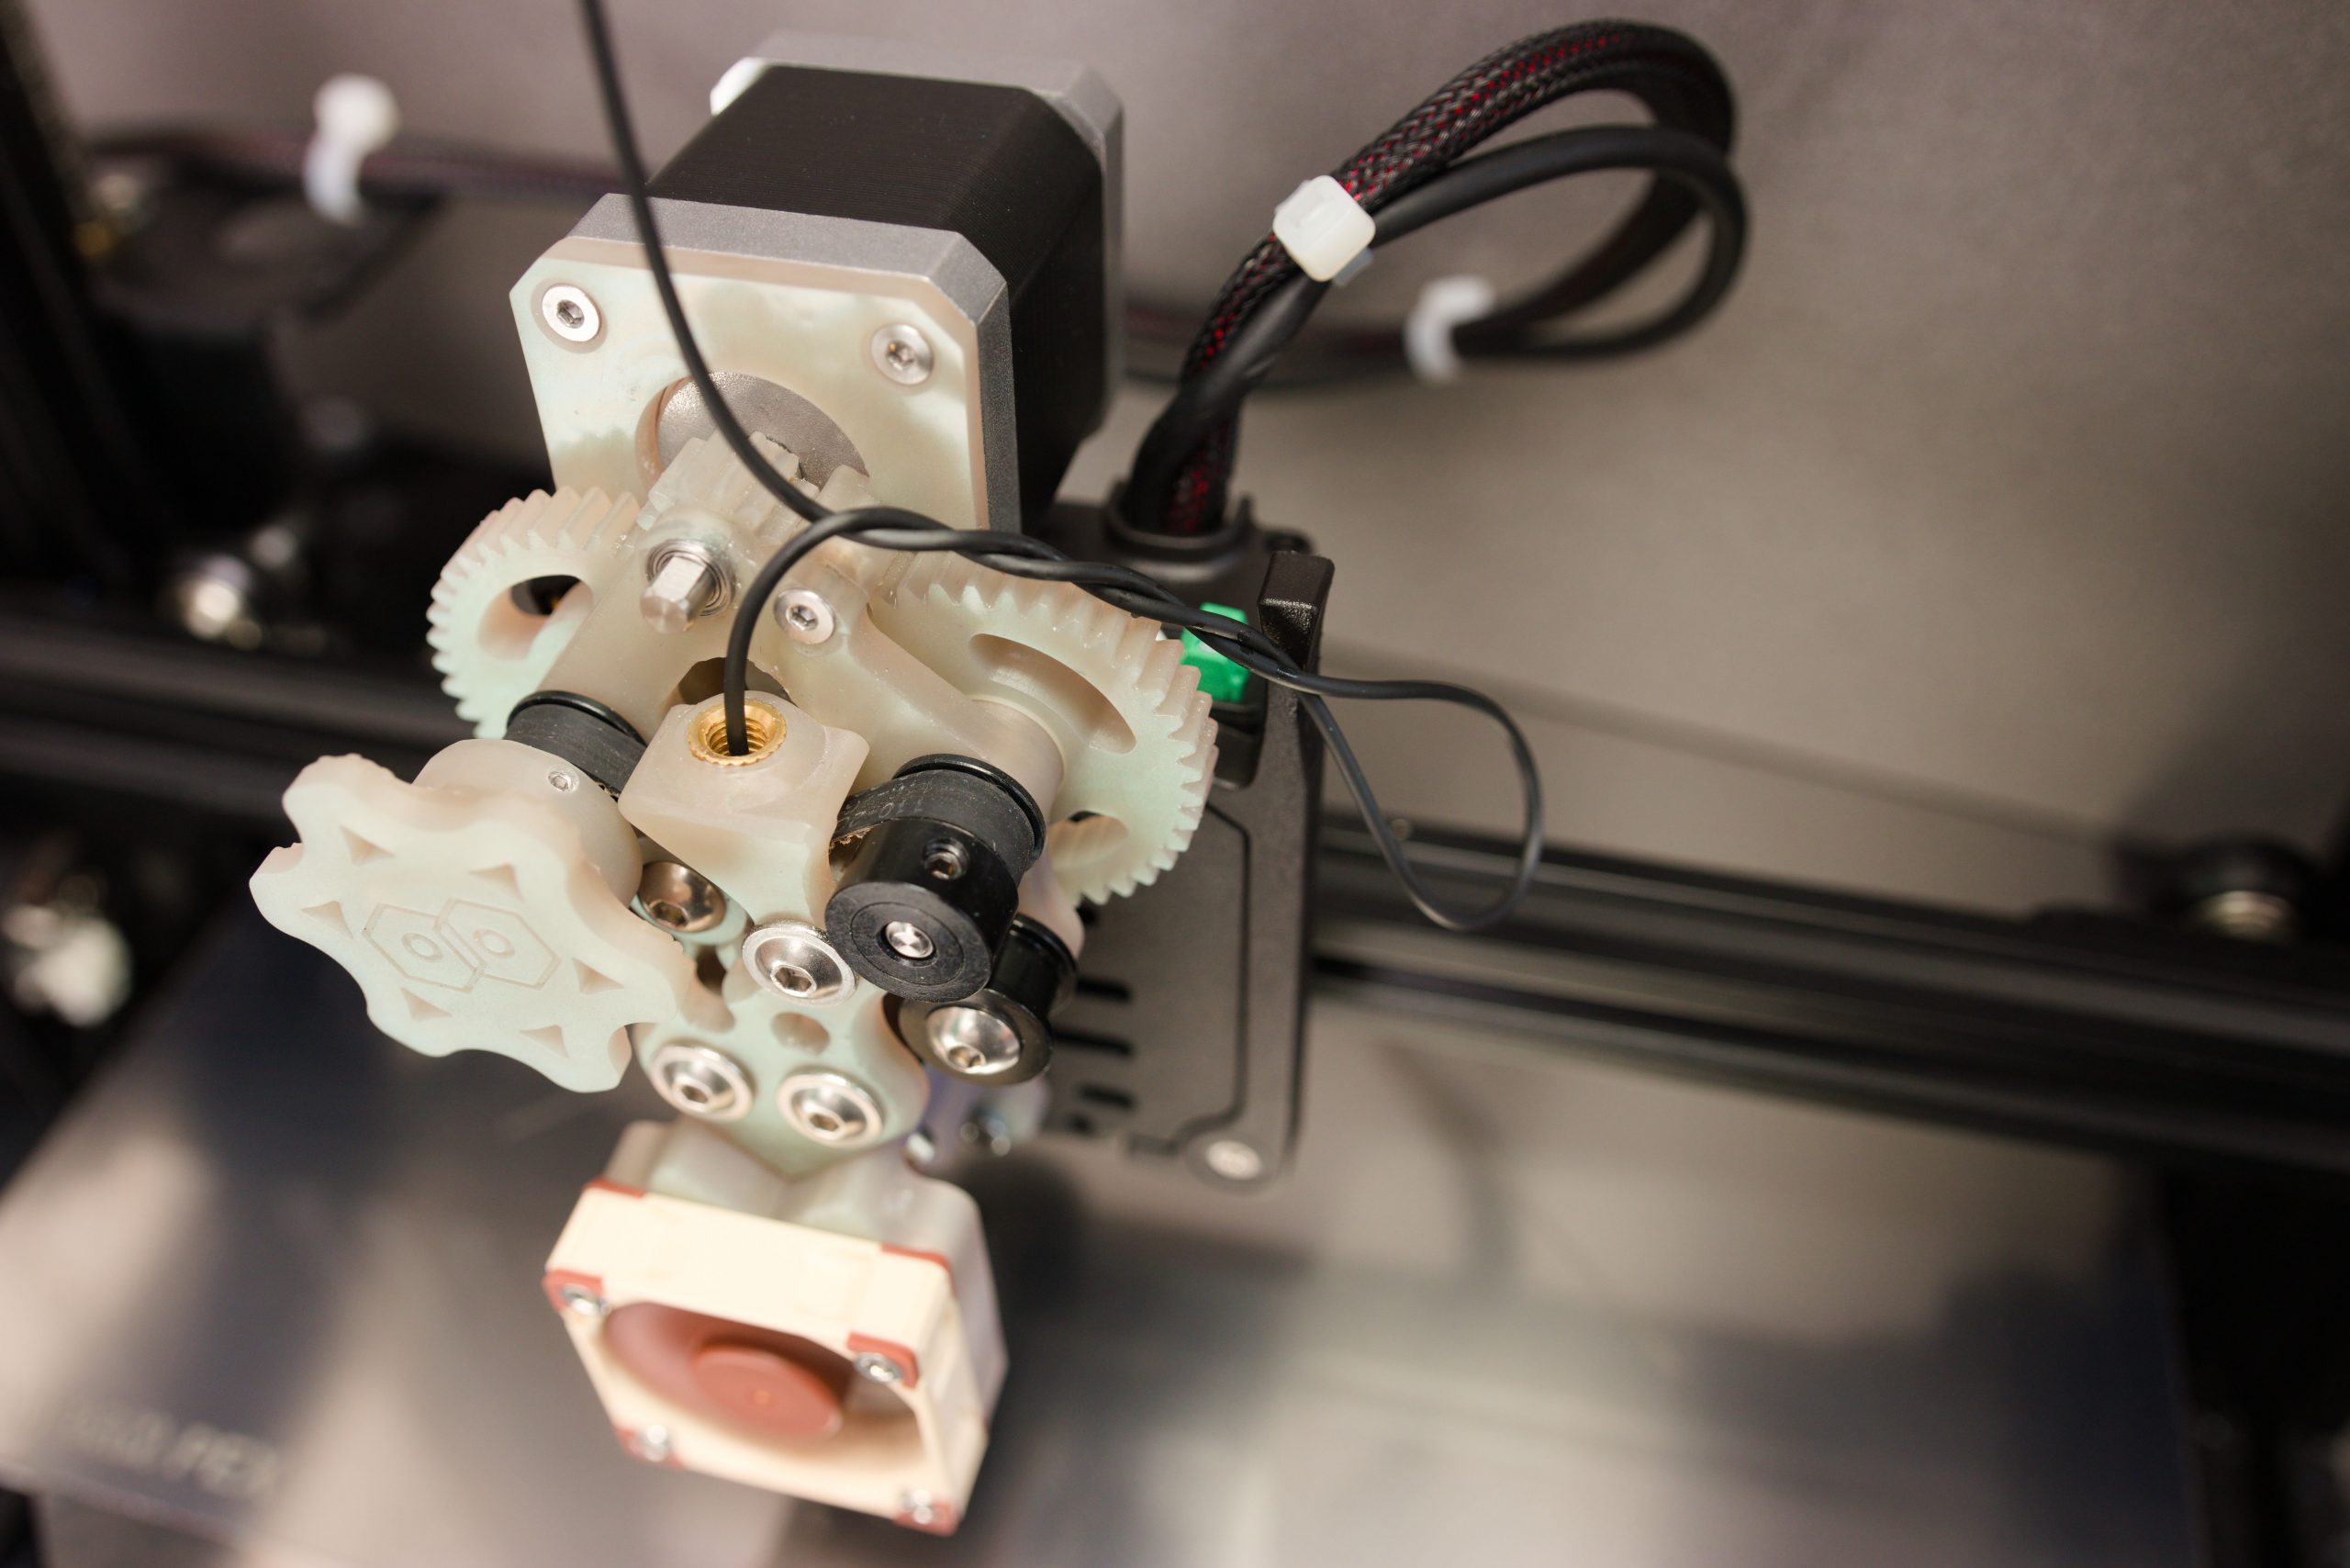
The real thing: Papilio Alpha Builds

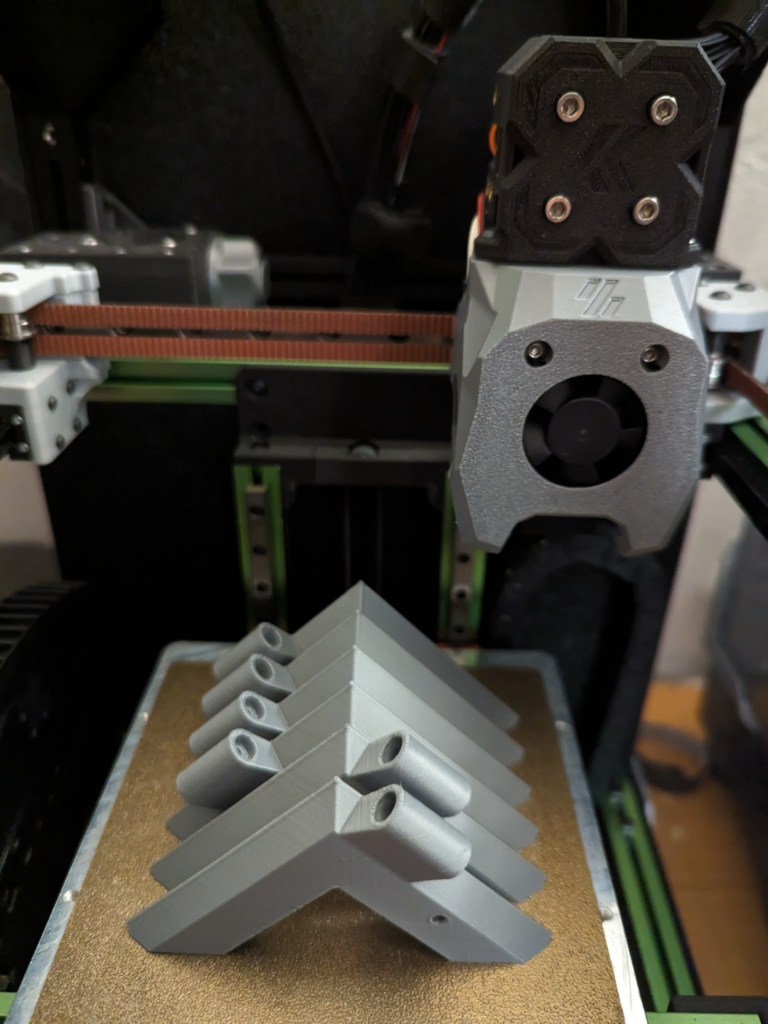
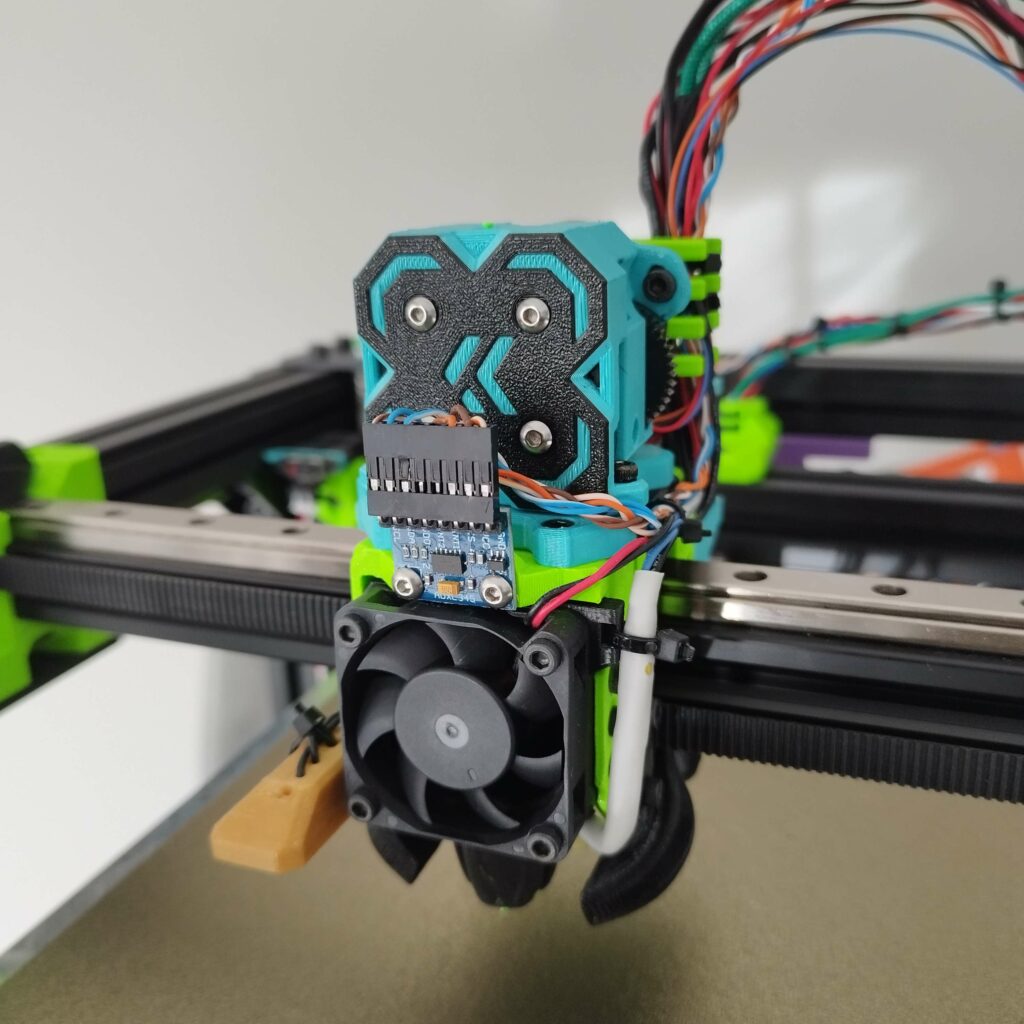


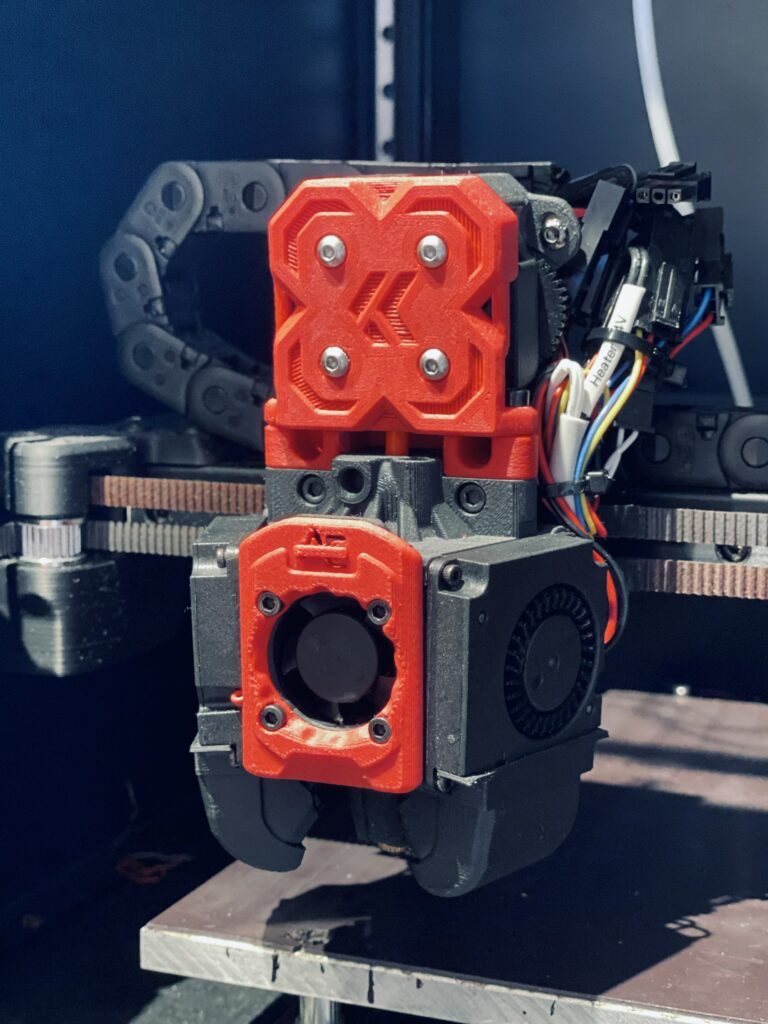
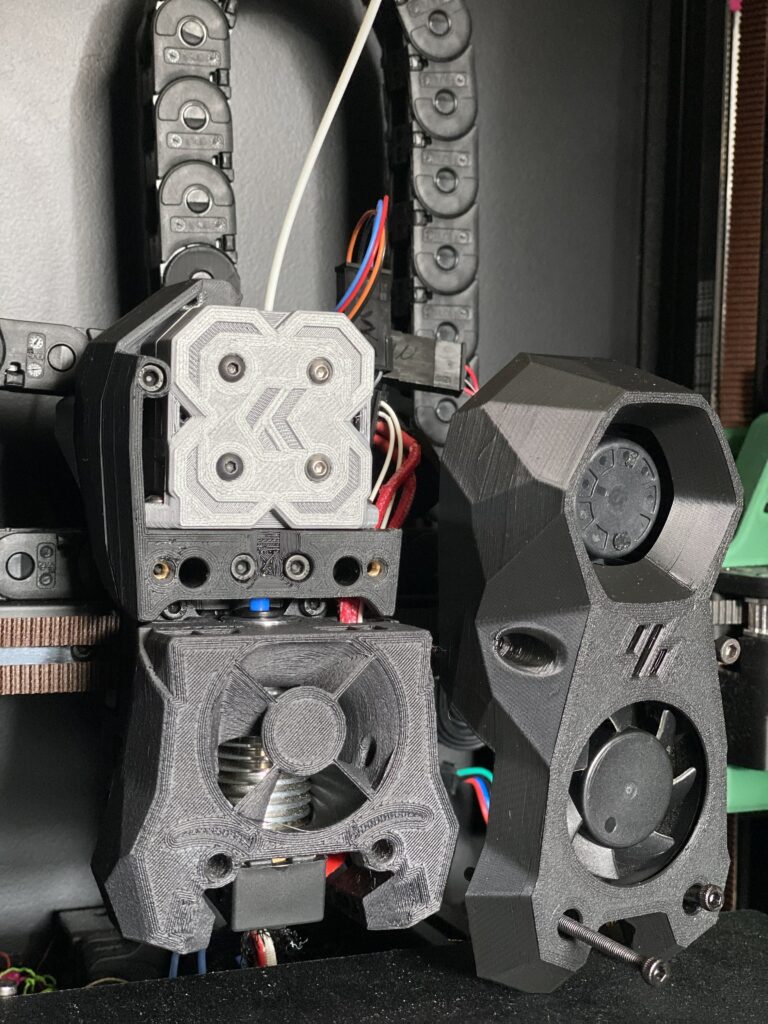
Thanks to all the Alpha Testers!
There are two of them?

Yes indeed! There are two versions of the extruder, the Papilio and Papilio Lite. After many many iterations the Papilio was the first working version of the belt extruder. The design reminded me on a butterfly so I named the extruder Papilio– latin for butterfly. But I didn’t stop! My goal was to develop a much more powerful design, so I went further into the rabbit hole. After many attempts and failures I ended up with the Papilio Lite: Less weight, more power. This doesn’t mean the original Papilio is outdated, he just got a brother.
What has changed?
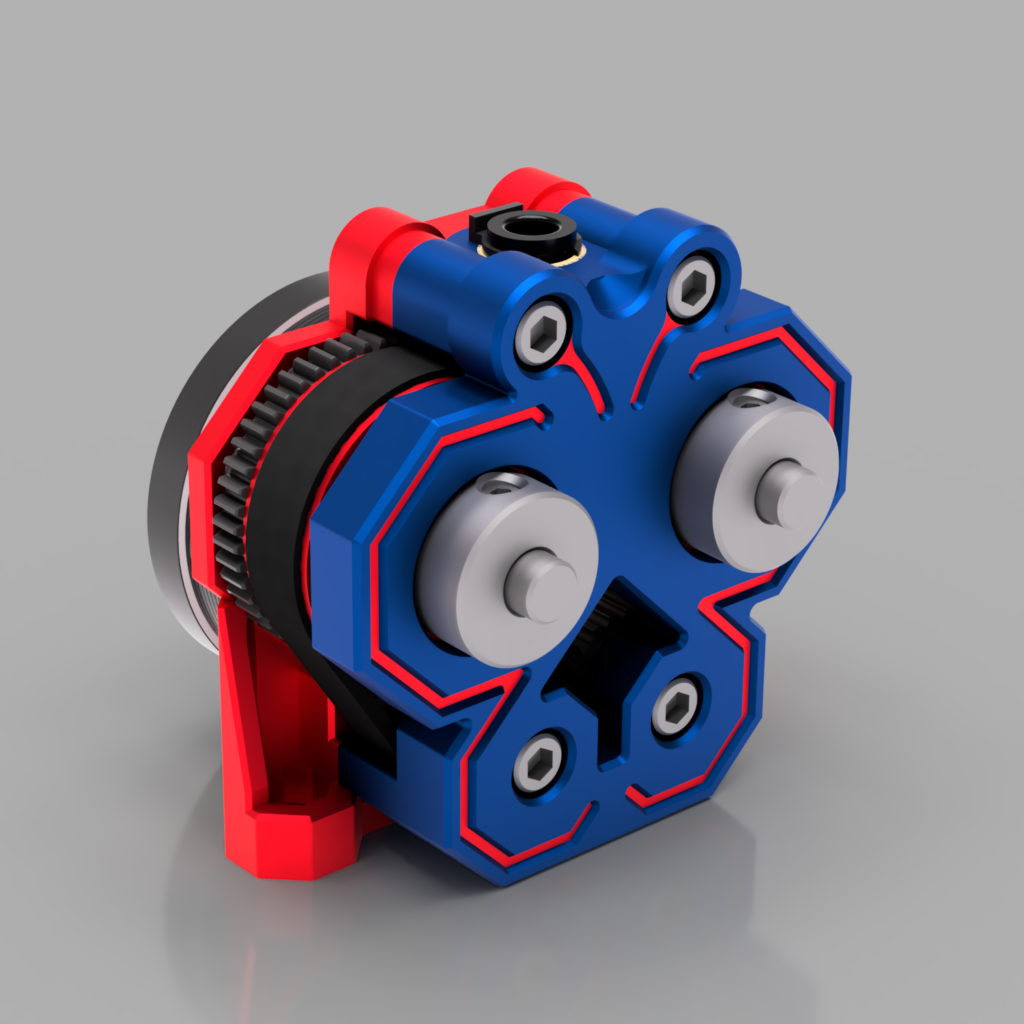
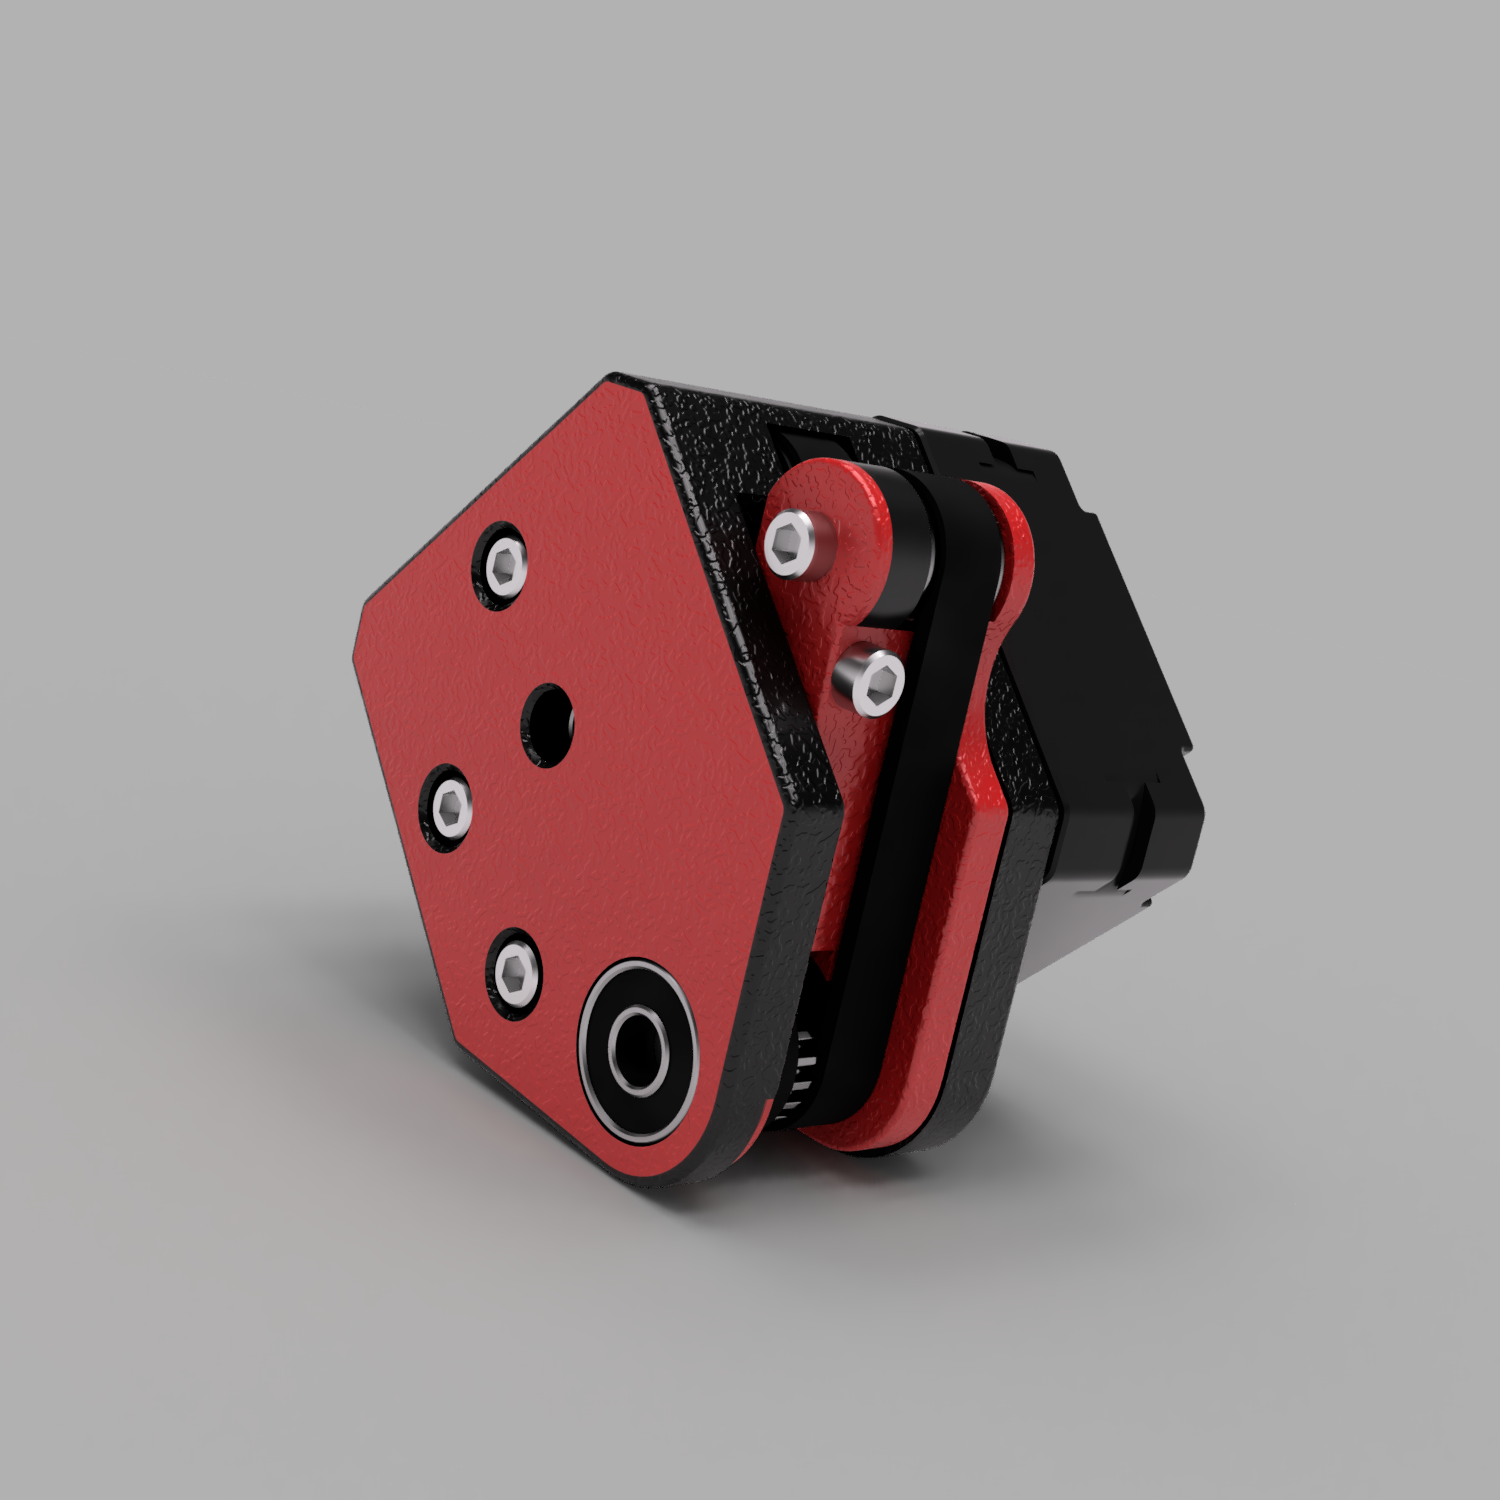
The Papilio Lite
The Papilio Lite got it’s name from the it’s internals – rather than using the BMG Drive Gear assembly, the Lite uses the Gears from the LGX Lite. With the two stage reduction of 44:10 and 37:17 ( or 44:8, 37:17 with a 8T motor) the Papilio Lite is not only much stronger but also lighter! With 130g the Lite saves you another 10g on the toolhead compared to the original Papilio!
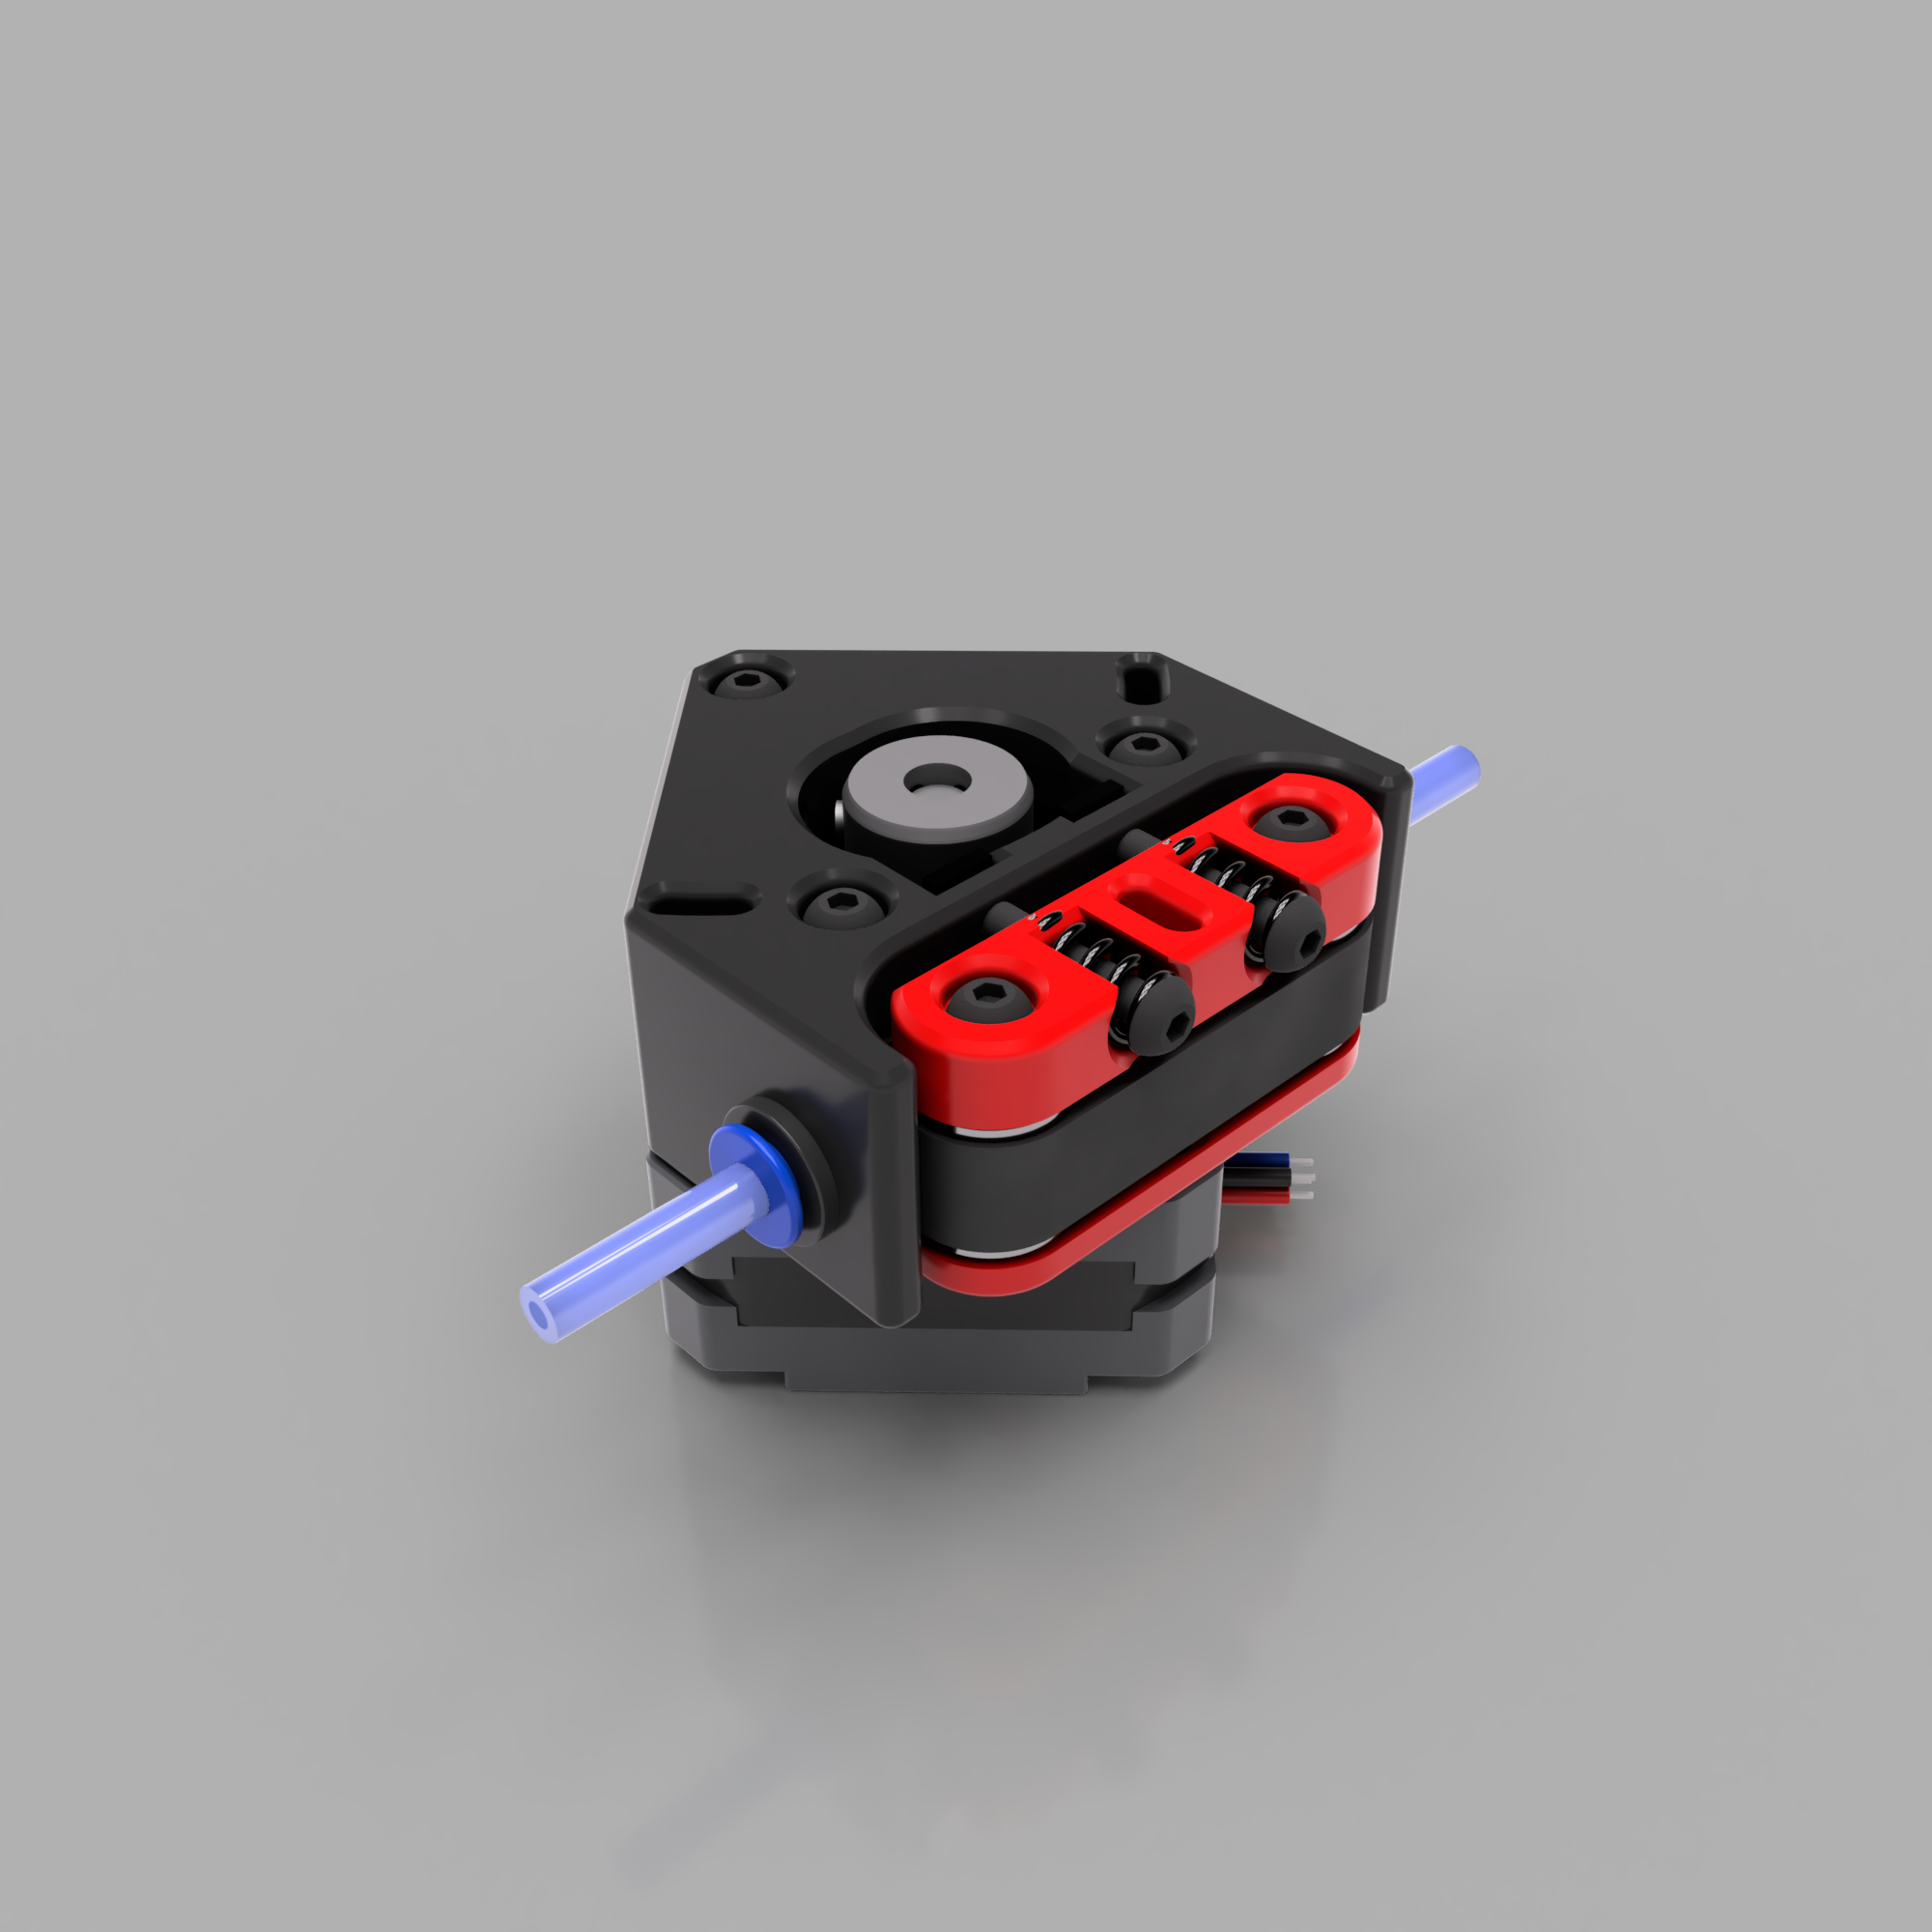
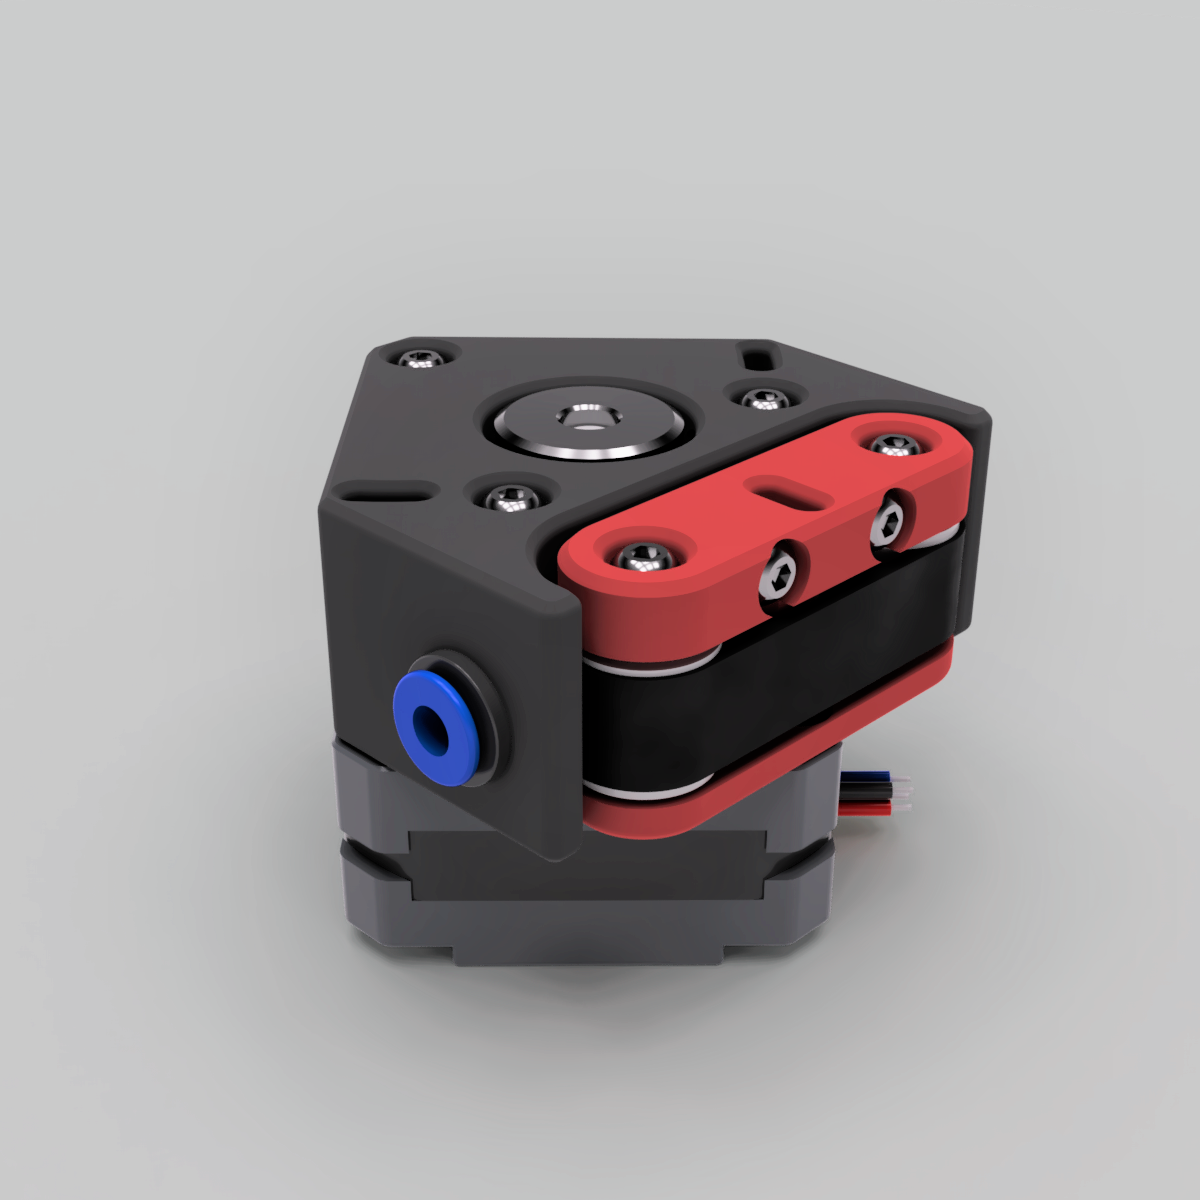
The Papilio Lite also uses a Dual-Drive System to feed the filament on both sides by the two timing belts. The much more closed design of the Papilio Lite allows you to print flexibles, which wasn’t possible with the original design.
Like the original Papilio, the Papilio Lite uses the Sherpa Mini footprint, making it compatible with a wide range of toolheads – due to it’s increased depth it got some additional mounting points lining up with the LGX Lite. The boxed and compact design makes it even compatible with the Voron Steathburner!
Open source – this is our project!
As all my work the Papilio is also an Open Source project – all files are free to use! You get all the STLs and CAD files via my GitHub and the build logs below. I also added a User Mod Folder to the GitHub so you can contribute to the project with your awesome ideas and adaptions. I can’t wait to see what you will come up with 🙂 This extruder deserves it to be something special!
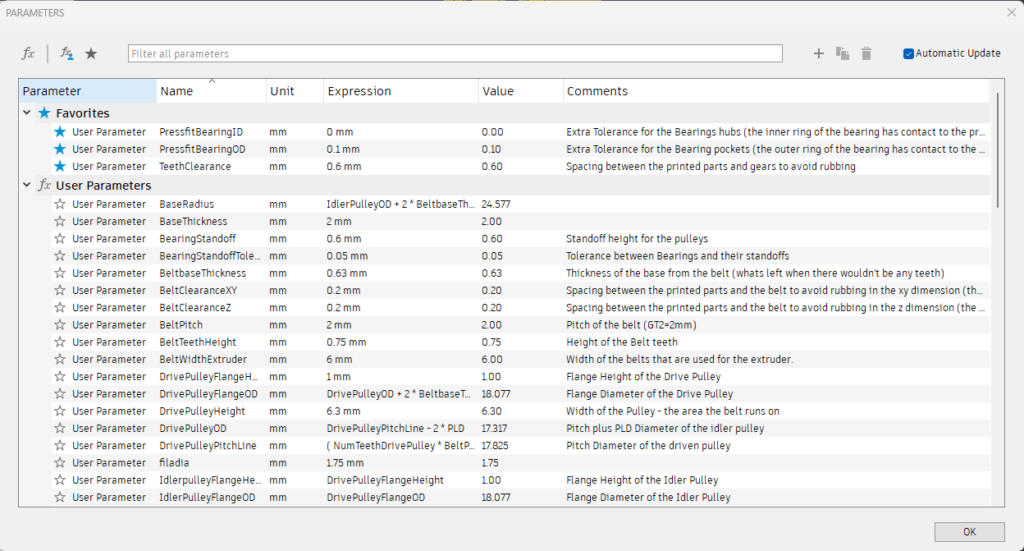
Also the CAD file is 100% parametric, so small adaptions like tolerances, different bearing or heatinserts sizes etc. are easy to do! I tried my best to describe the parameters, if you still have any questions feel free to ask. Ah and if you can’t do CAD yourself, I’m sure I can help you out 😉
❤️ Support my work
All my work is 100% Open-Source and free for everyone to use. But designing and developing all these mods takes a lot of time and effort, so if you appreciate my work and would like to support it and also help cover the costs of gettings the mods perfect, you can use one of the following links. Thanks a lot!


How can I try this out?
Current state: Beta-Testing
After seven months of a closed Alpha Testing it’s time for a public Beta!
While we did a lot of testing and improving during the Alpha, there’s still room for improvements. If the Papilio caught your interest you can now build your very own Papilio extruder! As for all my Beta testings all communication will happen on my Discord – check the channel “#papilio-chat” for more information. All files are available on my GitHub – check the build instructions below.
Click on the icon to join my Discord Server:

Alpha Testing: Completed
You are awesome! After half a year of Alpha testing we can now start the public Beta. Thank you very very much for all your help, suggestions, time and willing to help. Shoutout to these awesome people:
Build Instructions
I’m glad that you want to give the Papilio a try. Just click on the Papilio you want to build:
There’s so much more to tell you…
Is there anything I should know?
Yes, I want to tell you about some things I’ve learned, some things you might wonder about, and some things that will explain why it took me almost two years to develop the extruder. When you look at the Papilio, you might think, “This thing took you two years?!” The answer is yes. Just looking at the final design doesn’t reveal the challenges I encountered along the way. If you want to learn more about this, there’s a timeline at the end of this page.
What was the goal?
The goal was to create a small, lightweight extruder powered by a Nema 14 motor that uses belts to push the filament. At the same time, the extruder should use common and affordable hardware to make it easy to build and maintain.
Isn’t there a lot of friction?
That’s a very good question. Why? When you look at the metal extruder gears we typically use, you don’t have to worry about friction at all. The finely machined gears mesh perfectly and spin without much loss of torque. However, with belts, things are a bit different. The belts have a large contact area with the pulleys, the filament, and the second belt. All of this adds friction to the motion. But what does that mean? We need a very strong motor that can handle the friction. However, stronger motors like Nema 17’s are heavier, which isn’t very compatible with the goal of a direct-drive extruder. So, a transmission is needed to get more power out of the tiny Nema 14. This is the reason it took me so long to develop the extruder. All the gear ratios I tried either couldn’t generate enough torque (like the harmonic drive) or weren’t manageable in the small form factor. I experimented with several cycloidal and planetary designs that seemed promising but always came back to the spur gear reduction due to size and functionality.
How does it deal with all the friction?
Friction is no longer the limiting factor. Sure, the belts still add friction, and that’s something we can’t change without manufacturing special belts. But especially the Papilio Lite is so powerful that we don’t have to worry about the friction anymore. The reduction ratio on the original Papilio isn’t as high as on the Papilio Lite, which is why I recommend the Lite for speedy setups (>20mm³). However, for most setups out there, the hotend will run out of melting capabilities before we reach the limits of the Papilio.
That being said, I want to add that the brand of the Nema 14 motor matters a lot. I previously recommended getting a Moons Nema 14 for the Papilio. This might change in the future, but the current LDO motors are too weak and get too hot under load. While a Moons motor barely gets warm, an LDO motor gets burning hot. Due to the lower gear ratio, this is especially important for the original Papilio. The Papilio Lite also works fine with an LDO Nema 14.
In conclusion, while overcoming friction challenges was a significant part of this extruder’s development, I’ve successfully addressed these issues, and the Papilio, especially the Lite is a powerful and efficient solution for most setups.
Why isn’t there any belt tensioner or idler arm?
That’s another very good question! As a short answer: Less is more and more is right…
My first designs had a belt tensioner and an idler arm to adjust the tension on the filament. I noticed quite quickly that this isn’t as useful as you might think. The less tension the belts have, the more grip we get on the filament. This is because the rubber on the belt can squish and deform less with a very tensioned belt compared to a little more loose belt. In contrast we want quite some squish between the belts and the filament – in other words we want the belts to press on the filament. Because of this I always adjusted both tensioners to the same position: a not very tight belt paired with a high squish on the filament. Since it’s definitely not an easy task to implement the tensioners into the design I decided to eliminate them during the design process. This may sound unconventional but it works very well.
You mentioned custom belts, what would you imagine?
Custom belts are very hard to manufacture as it would require special molds and depending on what we want, custom machines. But lets talk about what would be a nice to have:
Custom coated and shaped belts
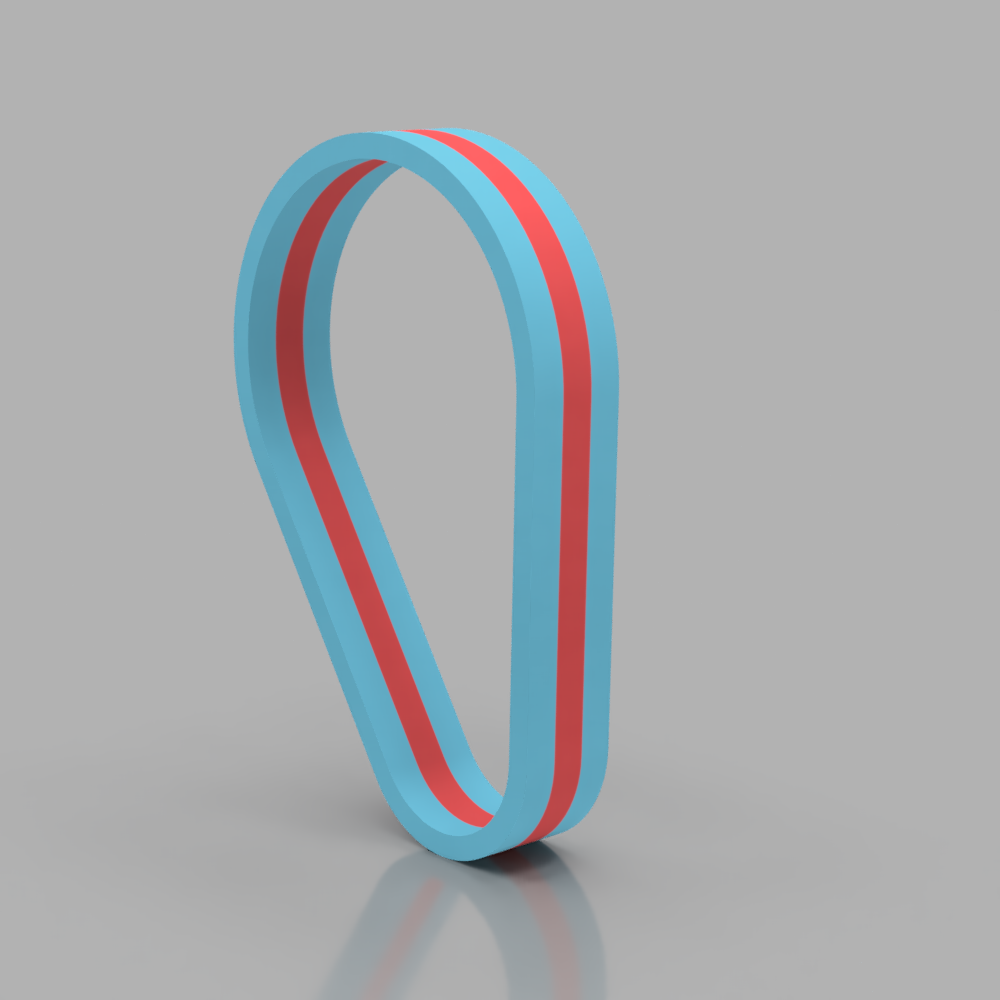
Looking at the belt we have 3 areas, where the outer two areas are just unused flanges (the blue area on the picture below) and the filament-contact area in the middle (the red area on the picture below). On my very first Belt Extruder designs I inverted the belt so that the filament was running on the teeth side of the belts. The idea was that the teeth of both belts will interlock and sync both sides. Due to the nylon coating and much lower contact area to the filament this didn’t work out. So Imagine a looped belt that has a smooth area in the middle, just like on the outside of the belt. That way the teeth of the belt would act as a boundary / guide for the filament and they would sync both belts. The nylon coating of the teeth would reduce the friction a lot while the filament can touch the bare rubber. Maybe some coating here to increase the grip even more?
You may wonder why I would keep a 6mm wide belt? First, because that would make the manufacturing a little easier – in theory you can grab a regular 6mm looped belt and take away the middle teeth section with a precise lathe till the rubber smoothed out. Second, because we still want a boundary for the filament. I also experimented with belts that are smaller than 6mm and offset belts to reduce the contact area between the belts (so not between belt and filament but belt to belt). But this wasn’t very successful. When the belt gets pressed against the filament, the belt deforms / the outer areas tend to lift up. With smaller belts they always rolled to the side and everything collapsed because the belt tried to avoid the filament. At the same time a smaller belt has a smaller contact area to the pulley which means less area to bring the motor torque on the belt. So long speech short: a 6mm belt just seems to be perfect for this application.

What’s planned already?
- Papilio Pro: A version which uses custom made hardware to get a light weight and very powerful extruder
- Papilio Bowden: Of course there will be a bowden version of the extruder for your bowden setup – powered by a Nema 17
How the Papilio was born
???

Papilio Pro
The Papilio Pro – we will see what the Papilio flies us to.
May 2023

The Papilio Lite!
It’s been a while since I designed the original Papilio and I’ve learned a lot since then. So now it’s time to introduce the next version of the Papilio: The Papilio Lite! Less weight, more power.
March 2023
The Papilio Extruder!
And here are we now: The Papilio Extruder pushes filament for many weeks now, and it’s time to build your own!
December 2022
And then, after hundreds of hours a butterfly landed…
Okay no harmonic drive, what then? Something cheap and simple! So I went for the well known and easy to get BMG Gear assembly, some tinkering and I made a butterfly, such a piece of art! After so many hours, days months I finally got a working extruder in my hands.
September 2022
Such a fail
Months and hundreds of prints later I was at a point where I realized that the harmonic drive Idea looks super cool but isn’t easy to setup and not strong enough, even though this means the last moths have been a waste of time… that was incredibly demotivating. Okay I learned a ton of things and the harmonic drive idea is not dead yet but we need something more simple.
May 2022
Revision of the Revision of the Revision of the…
Hell I spent so much time on improving this little thing. While the Harmonic Drive looked super cool, it wasn’t strong enough. I spent months on improving the design over and over again… and again.
April 2022

Okay okay we need a reduction
The Nema 14 definitely needs a reduction, but what type of reduction? Something crazy, something special, something that just as cool as an extruder running with belts. I know a Harmonic Drive! But a harmonic drive with a GT2 belt as flex spline, the Belt driven Belt-Extruder… I thought so.
22.12.2021
Proper Extruder
Damn JÓN! You made a thing! 😀
After the Creality Contest I focused on the Belt Mod and the BeltBox Extruder went a little out my mind, but in the meantime Jon made a piece of art with his Proper Extruder. This brought my attention back to the project and I decided also to go for a direct drive system.
Image source: properprinting.pro/product/proper-extruder/
August 2021
Flip the belt
For the next design I decided to use the smooth side of the belt and let me tell you, this worked so much better! But how do we get both belts in sync? Still a problem to solve…
Somewhat later
A few versions later
A few version later, some improvements and there was actually a somewhat working design, we’re getting closer! But the toothed side of the belt still feels too smooth and slippery… we have to improve that!
18.07.2021
The BeltBox Extruder started
After the great success of my Belt Mod for the Ender 3 I thought “What else can I add belts to?”. Since I had quite some extrusion issues at this time I decided to build a belt driven extruder… But how? Back then it was a very basic design without any reduction, just a few pulleys and idlers. And it used the toothed side of the belt so the teeth of both belts interlock and act like a dual drive system.